



1. Introduction
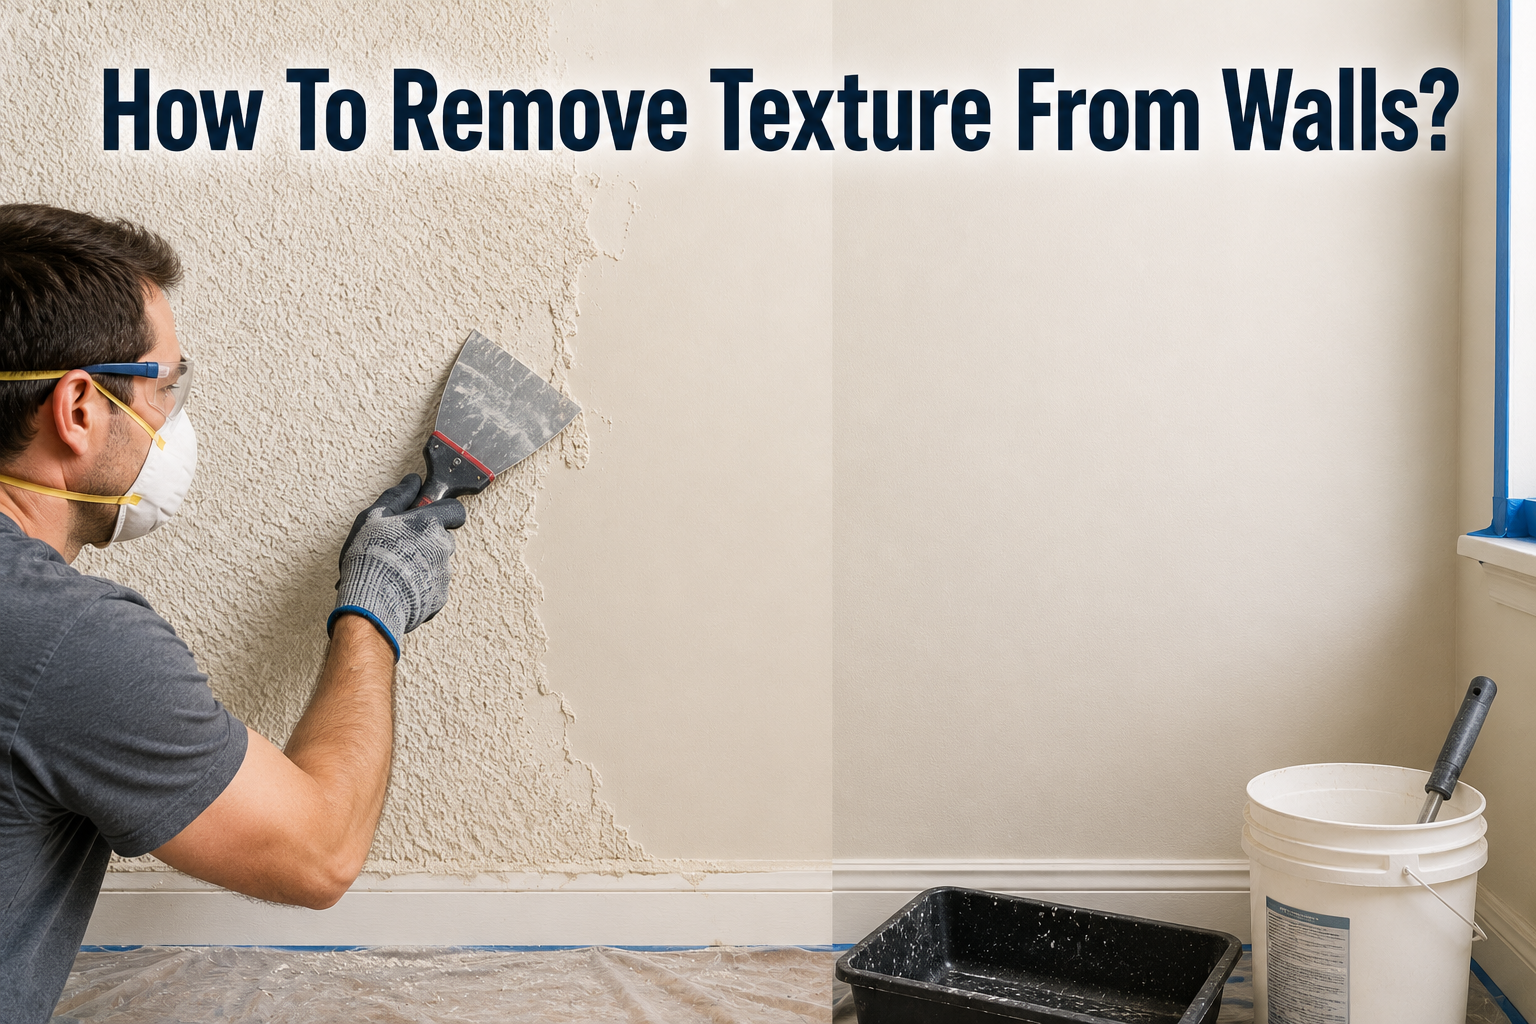
Textured walls were once one of the most popular finishes in homes, but tastes change, and so do the needs of a home over time. If you’re looking at bumpy, uneven walls and wondering how to remove texture from walls without hiring an expensive contractor, this guide walks you through the entire process in plain, easy-to-follow language.
Homeowners choose to remove texture for a few common reasons: a smoother, more modern look, easier repair of damaged spots, better resale appeal, and simpler long-term maintenance. This guide covers everything from identifying your texture type and essential safety testing, to step-by-step removal methods, patching, priming, and painting, so you can achieve smooth, professional-looking walls with confidence.
2. Understanding Your Wall Texture
Before grabbing any tools, it helps enormously to understand exactly what type of texture you are working with. Not all wall textures are created equal, and the type applied to your walls will directly affect how difficult, messy, and time-consuming the removal process turns out to be.
Types of Wall Texture
There are several common texture styles found in homes, each with its own look and application method.
Popcorn texture is a bumpy, cottage-cheese-like finish most commonly found on ceilings, though it occasionally appears on walls in older homes. It was sprayed on using a hopper gun and was extremely popular from the 1950s through the 1980s.
Orange peel texture is a subtler, more finely textured finish that resembles the skin of an orange, hence the name. It is sprayed on in a thin, even layer and is one of the lighter, easier textures to work with.
Knockdown texture starts out similar to orange peel but is partially flattened, or “knocked down,” with a wide trowel before it fully dries. This creates a mottled, stucco-like appearance that is still fairly common in newer homes.
Skip trowel texture is applied by hand with a trowel in a more irregular, artistic pattern, often leaving visible ridges and texture variations across the surface. It tends to be thicker and more deliberate than sprayed textures.
Sand swirl texture incorporates fine sand into the texture compound, which is then swirled by hand into circular or fan-shaped patterns. This is one of the more decorative and labor-intensive textures to both apply and remove.
The table below summarizes these texture types for quick reference.
| Texture Type | Appearance | Common Locations | Removal Difficulty |
|---|---|---|---|
| Popcorn | Bumpy, cottage-cheese-like | Ceilings, older homes | Moderate |
| Orange Peel | Fine, subtle bumps | Walls, newer homes | Easy |
| Knockdown | Mottled, stucco-like | Walls and ceilings | Moderate |
| Skip Trowel | Irregular, hand-applied ridges | Walls, decorative spaces | Difficult |
| Sand Swirl | Circular or fan-shaped patterns | Walls, older decorative homes | Difficult |
How to Identify Which Type You Have
Identifying your texture type is usually straightforward with a close visual inspection. Stand a few feet back from the wall and look at the overall pattern first, then move closer to examine the fine detail.
Bumpy, random patterns generally indicate popcorn or orange peel, while flattened, mottled patterns point to knockdown. If you can see clear brushstroke or trowel marks with a hand-applied, less uniform look, you are likely dealing with skip trowel or sand swirl texture.
Running your hand gently across the surface can also help, since sprayed textures like orange peel and popcorn tend to feel more uniform, while hand-applied textures like skip trowel feel more varied and deliberate under your fingers.
Why Texture Type Affects Removal Difficulty
The type of texture on your walls matters because it determines how much material needs to be removed, how thick that material is, and how it was bonded to the wall underneath. Lighter textures like orange peel are thin and often come off relatively easily with basic wetting and scraping.
Thicker, hand-applied textures like skip trowel and sand swirl involve significantly more material, which means more time, more water, and more careful scraping to avoid gouging the drywall underneath.
Popcorn texture, while visually dramatic, is often surprisingly easy to remove once softened with water, though its age often means it needs to be tested for asbestos first, which we will cover in detail in the next section.
Knowing your texture type before you begin gives you a realistic expectation of how long the project will take and helps you gather the right amount of supplies from the start.
3. Safety First: Testing for Asbestos and Lead
Before you pick up a scraper or turn on a garden sprayer, there is one step in the process of how to remove texture from walls that should never be skipped: testing your walls for asbestos and lead.
Many homeowners get excited about updating their space and jump straight into scraping, only to realize later that they may have disturbed hazardous material without knowing it.
Taking a little extra time here protects your health, your family’s health, and even your budget, since dealing with contamination after the fact is far more expensive and stressful than testing beforehand.
Wall texture, especially older popcorn ceilings and heavily layered wall finishes, was often applied decades ago using materials that we now know can be dangerous when disturbed.
Scraping, sanding, or wetting these materials can release fine particles into the air, and breathing them in is where the real risk lies. This is why testing is not just a suggestion for older homes, it is genuinely a critical first step.
Why Pre-1980s Homes Need Testing
If your home was built or renovated before 1980, there is a real possibility that the texture on your walls or ceilings contains asbestos. Asbestos was widely used in construction materials, including joint compounds, plaster, and textured coatings, because it added strength and fire resistance. It was popular right up until stricter regulations in the late 1970s and early 1980s significantly reduced its use in residential construction.
Lead is a similar concern, though it is usually associated with paint rather than the texture material itself. If your walls were painted before 1978, there is a chance that layers of lead-based paint sit underneath or within the texture, and disturbing that paint during removal can release lead dust into your home.
The tricky part is that you cannot tell just by looking at a wall whether it contains asbestos or lead. Texture that contains asbestos looks identical to texture that does not. The only reliable way to know for sure is to test it, and this single step can completely change how you approach the rest of the project.
The table below gives a quick overview of when testing matters most.
| Home Age | Asbestos Risk | Lead Risk | Testing Recommended |
|---|---|---|---|
| Before 1960 | High | High | Strongly recommended |
| 1960–1980 | Moderate to High | Moderate | Strongly recommended |
| 1981–2000 | Low | Low | Optional but still wise |
| After 2000 | Very Low | Very Low | Generally not required |
Even if your home falls into a lower-risk category, previous renovations or patch repairs using older materials can still introduce asbestos or lead into a newer home. When in doubt, testing is always the safer choice.
How to Collect a Sample or Hire a Professional
There are two main routes homeowners can take when it comes to testing: doing it themselves with a home test kit, or hiring a certified professional to handle the sampling and lab analysis.
DIY testing involves purchasing an asbestos or lead test kit, which are widely available online and at hardware stores. The general process involves lightly misting a small area of the texture with water to reduce dust, then carefully scraping a small sample into a sealed bag using gloves and a mask. This sample is then mailed to a certified laboratory, and results typically arrive within a few business days to about two weeks, depending on the lab and the level of service you choose.
Hiring a professional is the recommended route if you suspect a high risk of contamination or simply want peace of mind. Certified inspectors know exactly where to collect samples from for the most accurate results, and they follow safety protocols that minimize the risk of releasing fibers or dust during the sampling process itself. Many inspectors can also test for both asbestos and lead in the same visit, which saves time.
Here is a simple breakdown to help you decide which option fits your situation:
| Factor | DIY Test Kit | Professional Inspector |
|---|---|---|
| Cost | Lower, generally affordable | Higher, but more thorough |
| Turnaround Time | Several days to two weeks | Often faster, sometimes same-day sampling |
| Accuracy | Good if instructions are followed carefully | Very high, done by trained experts |
| Safety During Sampling | Requires careful self-protection | Handled with professional-grade precautions |
| Best For | Low-risk homes, budget-conscious projects | Older homes, larger projects, cautious homeowners |
Whichever option you choose, the goal is the same: get a clear answer before any scraping, sanding, or wetting begins.
What to Do If Asbestos or Lead Is Found
If your test results come back positive, it does not mean your renovation is over, it simply means the approach needs to change. Disturbing asbestos or lead yourself is not recommended, and in many areas, it may even violate local regulations, particularly if the material will be disturbed extensively.
In most cases, the safest and most responsible option is to hire a licensed abatement contractor who specializes in the safe removal or encapsulation of hazardous materials. Abatement professionals use specialized equipment, including negative air pressure systems and proper containment barriers, to ensure that fibers and dust do not spread throughout your home during removal.
Another option, particularly for asbestos-containing texture that is in stable condition, is encapsulation rather than removal. This involves sealing the texture with a specialized coating so that it can no longer release fibers, and then skim coating or covering it as needed for a smoother appearance.
This can be a more affordable and less invasive solution compared to full removal, though it is worth discussing both options with a licensed professional to determine what makes sense for your specific situation.
It is worth noting that living in a home with undisturbed asbestos or lead-based materials is generally not considered dangerous. The risk comes specifically from disturbing these materials in a way that releases particles into the air, which is exactly what happens during typical texture removal methods like scraping or sanding.
This is precisely why testing before you begin is such an important part of learning how to remove texture from walls the right way.
Basic Safety Gear for Testing and Beyond
Even if your test results come back clear, it is still wise to use basic protective gear throughout the sampling and removal process. Good safety habits protect you regardless of what the test reveals, and they are inexpensive compared to the peace of mind they provide.
At a minimum, you should have the following on hand before collecting a sample or beginning any wall work:
- A properly rated dust mask or respirator, ideally an N95 or higher rating, to prevent inhaling fine particles
- Protective goggles to keep dust and debris out of your eyes
- Disposable gloves to avoid direct skin contact with old materials
- Old clothing or a disposable coverall that can be washed or discarded after the job
- Plastic sheeting to contain dust and protect the surrounding area, even during sample collection
Taking these precautions seriously, even for something as small as collecting a single sample, sets the tone for a safer project overall. Once you have confirmed your walls are free of asbestos and lead, or you have arranged for professional abatement if needed, you can move forward with confidence into the actual process of removing wall texture, knowing you have protected your health and your home from unnecessary risk.
4. Tools and Materials You’ll Need
Once you have confirmed your walls are safe to work on, the next step is gathering the right tools and materials. Having everything on hand before you begin saves you from constant trips to the hardware store mid-project and helps the work go far more smoothly.
Full Checklist of Supplies
Below is a comprehensive list of what you will typically need for a standard texture removal project using the wet scraping method, which is the most common approach homeowners use.
| Item | Purpose |
|---|---|
| Garden sprayer or spray bottle | Wetting the texture to soften it |
| Wide putty knife or drywall scraper (6-10 inch) | Scraping softened texture off the wall |
| Plastic sheeting or drop cloths | Protecting floors and furniture |
| Painter’s tape | Securing plastic sheeting and protecting trim |
| Sanding sponge or sandpaper (medium to fine grit) | Smoothing the wall after texture removal |
| Joint compound | Filling gouges or skim coating uneven areas |
| 6-inch and 12-inch taping knives | Applying and smoothing joint compound |
| Sanding pole or hand sander | Reaching high areas and large surfaces |
| Dust mask or respirator | Protecting your lungs from dust and debris |
| Safety goggles | Protecting your eyes |
| Work gloves | Protecting your hands during scraping |
| Bucket of warm water | Refilling sprayer and rinsing tools |
| Shop vacuum | Cleaning up debris as you go |
| Ladder or step stool | Reaching ceiling texture safely |
Optional Tools for Faster Results
While the list above covers the essentials, a few additional tools can speed things up considerably, especially for larger rooms or whole-house projects.
A pole sander, for instance, allows you to sand large wall or ceiling areas without constantly repositioning a ladder, which saves significant time and physical strain. A texture removal tool, sometimes sold as a specialized scraper with a slightly flexible blade, can also make quick work of stubborn spots without gouging the drywall as easily as a standard putty knife might.
Some homeowners also invest in a wallpaper steamer, which can be repurposed to help soften particularly thick or stubborn texture in smaller, targeted areas.
If you are working on a large-scale project, renting an electric sander with a dust collection attachment can dramatically cut down on airborne dust compared to manual sanding, making cleanup faster and the air quality in your home noticeably better throughout the process.
Where to Buy or Rent Equipment
Most of the basic supplies for how to remove texture from walls can be found at any major hardware store, including putty knives, joint compound, sandpaper, and plastic sheeting. These are inexpensive, widely available, and rarely need to be special ordered.
For larger or specialized tools, such as pole sanders, electric sanders with dust collection, or wallpaper steamers, many hardware stores offer rental programs by the day or week, which is often more economical than purchasing equipment you may only use once.
It is worth calling ahead to confirm availability, especially during busy renovation seasons in spring and summer when rental equipment tends to be in higher demand.
5. Preparing the Room
Proper preparation is one of the most overlooked yet important steps in the entire process. Rushing through this stage often leads to more cleanup time later, damaged furniture, or accidental water damage to floors and outlets. Taking thirty extra minutes here can save hours of frustration afterward.
Removing Furniture and Wall Décor
Start by clearing the room as much as possible. Remove furniture entirely if you can, or at minimum move it to the center of the room and cover it thoroughly with plastic sheeting or old bedsheets. Take down any wall art, mirrors, curtains, and light fixtures where feasible, since water and debris from the texture removal process can easily damage or dirty these items if left in place.
If you are working in a room with built-in shelving or cabinetry that cannot be moved, cover it completely with plastic sheeting and secure the edges with painter’s tape to keep dust and moisture out.
Covering Floors and Outlets with Plastic Sheeting
Floors should be fully protected with heavy plastic sheeting or canvas drop cloths, taped securely along the baseboards to prevent water from seeping underneath. This step matters more than many homeowners expect, since the wet scraping method involves a significant amount of water dripping down walls throughout the project.
Electrical outlets and switch plates should be covered with painter’s tape to prevent water from getting inside them, which could pose a safety hazard. If possible, remove outlet and switch covers entirely and cover the openings with tape for added protection.
Turning Off Electricity
For any room where you will be working near outlets or switches, it is a good safety practice to turn off electricity to that room at the breaker panel before beginning work. This eliminates any risk of water contacting live electrical components during the wetting and scraping process. Once the project is complete and everything has fully dried, power can safely be restored.
Opening Windows for Ventilation
Good ventilation makes a noticeable difference in how comfortable and safe the work environment feels. Open windows and, if available, run a fan to help circulate air and reduce humidity buildup from the wet scraping process. This also helps disperse any dust generated during sanding stages later in the project, keeping the air quality in your home more manageable throughout.
6. Method 1: Wet Scraping (Most Common)
Wet scraping is by far the most popular and widely recommended method for how to remove texture from walls, largely because it requires minimal specialized equipment and produces reliable results for most texture types.
Step-by-Step Wetting Technique
Begin by filling a garden sprayer or spray bottle with warm water. Some homeowners add a small amount of fabric softener or a splash of vinegar to the water, which can help break down the texture compound slightly faster, though plain warm water works perfectly well on its own.
Working in small sections, roughly three to four feet at a time, spray the wall generously until the texture appears visibly saturated. Avoid soaking the entire wall at once, since the texture needs to remain wet while you scrape it, and working in smaller sections prevents areas from drying out before you get to them.
How Long to Let Texture Soak
After spraying, allow the section to sit for approximately ten to fifteen minutes. This soaking period allows the water to penetrate the texture material and begin breaking down the bond between the texture and the drywall surface underneath. You will often notice the texture beginning to look slightly darker and softer as it absorbs the moisture, which is a good visual indicator that it is ready for scraping.
If a section still feels firm or resistant after the initial soak, a second light misting followed by a few additional minutes of soaking time usually does the trick, particularly for thicker textures like skip trowel or sand swirl.
Scraping Technique to Avoid Damaging Drywall
Using a wide putty knife or drywall scraper, hold the blade at a low angle, close to the wall surface, and gently push the softened texture off in smooth, controlled strokes. Avoid digging the corner of the blade into the wall, and resist the urge to apply excessive pressure, since this is the most common cause of gouges and dents in the drywall underneath.
If you encounter a particularly stubborn spot, it is far better to re-wet that specific area and let it soak longer than to force the scraper through dry or partially softened texture. Patience here genuinely pays off in the quality of your final result.
Section-by-Section Workflow
The most efficient workflow involves spraying one section, moving to spray an adjacent section while the first one soaks, then returning to scrape the first section once it is ready.
This overlapping rhythm keeps you consistently working rather than standing around waiting, which significantly speeds up the overall project timeline. Continue this pattern methodically across the entire wall or ceiling until all texture has been removed.
7. Method 2: Skim Coating Over Texture
Not every homeowner wants to go through the process of fully removing texture, and in some cases, skim coating over the existing texture is actually the more practical choice.
When This Method Makes Sense
Skim coating is worth considering when the existing texture is in good structural condition, meaning it is well-adhered to the wall without significant cracking, flaking, or water damage.
It is also a good option for homeowners who want to avoid the mess and time investment of full removal, or for situations where the texture contains asbestos and full removal has been ruled out in favor of a safer, less invasive approach following professional guidance.
How to Apply Joint Compound Over Existing Texture
The process begins with applying a thin, even layer of joint compound directly over the textured surface using a wide taping knife, typically twelve inches or larger for efficient coverage. The goal is to fill in the low points of the texture while leveling out the high points, effectively burying the texture beneath a smooth new surface.
This often requires two to three coats, with each layer allowed to dry fully before the next is applied. Between coats, a light sanding helps knock down any ridges or high spots, gradually building toward a flat, uniform surface.
Sanding for a Smooth Finish
Once the final coat of joint compound has dried completely, a thorough sanding pass smooths out any remaining imperfections, feathered edges, or tool marks.
A sanding pole or hand sander with medium grit sandpaper works well for this stage, followed by a finer grit for a polished, paint-ready finish. Wiping the wall down afterward to remove sanding dust ensures the primer and paint will adhere evenly in the final steps of the project.
8. Method 3: Sanding Only
Sanding alone is a less commonly used method, but it does have its place in certain situations when learning how to remove texture from walls.
When to Use This Method
This approach works best for very light, thin textures such as fine orange peel, where there simply is not much material to remove. It can also be a reasonable choice in smaller spaces, like a single accent wall or a small bathroom, where the extra time investment of sanding is more manageable than it would be across an entire home.
Tools Required
The primary tools for this method include coarse to medium grit sandpaper, a sanding sponge or hand sander, and ideally a shop vacuum or dust collection attachment to manage the significant amount of dust this method produces. A dust mask or respirator is especially important here, since dry sanding generates far more airborne particles than the wet scraping method.
Pros and Cons Compared to Wet Scraping
Sanding only avoids the water and potential mess associated with wet scraping, and it can be a quicker option for very light texture. However, it generally creates significantly more dust, can be more physically tiring, and tends to be far less effective on thicker or more heavily applied textures, where wet scraping remains the more efficient and reliable choice overall.
9. Method 4: Chemical Texture Removers
For homeowners dealing with particularly stubborn or heavily painted-over texture, chemical texture removers offer another option worth considering.
How Chemical Removers Work
These products are specially formulated solutions that penetrate and break down the bond between the texture compound and the wall surface, often working faster and more effectively than water alone, particularly on texture that has been sealed under multiple layers of paint over the years.
Application Steps
Chemical removers are typically applied with a roller or brush directly onto the textured surface, then left to sit for a specified period, usually outlined on the product label, to allow the solution to fully penetrate.
Once softened, the texture can be scraped away using the same technique as the wet scraping method, often with noticeably less resistance than plain water alone would provide.
Safety Precautions
Because these are chemical products, proper ventilation is essential throughout the application and scraping process. Gloves and eye protection should be worn at all times, and it is important to keep windows open and, where possible, run fans to keep air circulating.
Always read and follow the manufacturer’s instructions closely, since dwell times and safety recommendations can vary between different products.
10. Dealing with Ceilings vs. Walls
While the fundamental process for how to remove texture from walls and ceilings is similar, there are important differences worth understanding before you begin.
Differences in Technique
Working on a ceiling is physically more demanding than working on a wall, since you are constantly reaching upward, often from a ladder, and gravity works against you throughout the process. Water and debris naturally fall downward, which means extra care is needed to protect your eyes and face during both the wetting and scraping stages.
Sections should generally be smaller when working on ceilings compared to walls, since it is harder to maintain even saturation overhead, and the awkward angle makes controlled scraping more challenging.
Extra Precautions for Ceiling Texture
Popcorn ceilings, in particular, deserve extra caution given how common they were in older homes, which ties directly back to the importance of asbestos testing discussed earlier in this guide.
Beyond that, protective eyewear becomes even more essential for ceiling work, since debris and water droplets fall directly toward your face rather than away from you as they typically would when working on a vertical wall surface.
Taking frequent breaks and using a sturdy, properly positioned ladder also helps reduce fatigue and the risk of accidents during this more physically demanding stage of the project.
11. Sanding and Smoothing the Surface
Once texture has been scraped away, the wall underneath is rarely perfectly smooth right away, which makes this next stage an important part of achieving a truly polished, professional-looking result.
Tools for Sanding
A sanding pole with a sanding screen attachment works well for larger wall and ceiling areas, allowing you to cover more ground with less physical strain compared to hand sanding alone. For smaller areas, detail work, or corners, a sanding sponge or hand sander offers more precise control.
Achieving a Smooth, Paint-Ready Finish
Begin with a medium grit sandpaper to knock down any remaining ridges, bumps, or scraper marks left behind from the removal process. Once the surface feels reasonably even, switch to a finer grit for a final smoothing pass.
Running your hand across the wall periodically as you work is a simple, effective way to feel for any remaining rough spots that might not be as obvious to the eye.
Dust Control Tips
Sanding inevitably produces a fair amount of fine dust, so keeping a shop vacuum nearby to capture debris as you go makes a noticeable difference in cleanup time.
Working with windows open and a fan running helps keep dust from settling too heavily in the room, and wiping the walls down with a slightly damp cloth after sanding removes any lingering fine particles before you move on to priming and painting.
12. Repairing Drywall Damage
Even with careful technique, it is common to encounter small gouges, dents, or damaged spots during the texture removal process, and addressing these properly is an important step before painting.
Common Issues After Texture Removal
The most frequent issues homeowners run into include small gouges from overly aggressive scraping, exposed drywall paper that has become slightly torn or fuzzy, and uneven spots where texture was thicker in some areas than others.
None of these issues are cause for concern, since they are all easily repairable with basic joint compound and a bit of patience.
How to Patch and Repair
For small gouges and dents, apply a thin layer of joint compound using a taping knife, feathering the edges outward so the patch blends smoothly into the surrounding wall. Larger or deeper damage may require two thin coats rather than one thick coat, since thick applications are more prone to cracking as they dry.
Drying and Curing Times
Joint compound typically takes anywhere from twenty-four hours to a full day to dry completely, depending on humidity levels and how thickly it was applied. It is worth resisting the temptation to sand or paint over compound that still feels cool or slightly soft to the touch, since this usually indicates it has not fully cured yet. Allowing proper drying time between coats and before painting ultimately leads to a stronger, more durable finish.
13. Cleaning Up
Cleanup is an essential final stage of the physical removal process, and doing it properly ensures your home returns to a livable, dust-free state before priming and painting begin.
Disposing of Texture Debris and Wastewater
Scraped-off texture and wastewater should never simply be poured down household drains, since the material can clog pipes over time. Instead, allow debris to dry out on your plastic sheeting, then bag it up for regular household disposal, unless your test results indicated asbestos or lead, in which case disposal must follow your local hazardous waste guidelines, which a professional abatement contractor will typically handle directly.
Cleaning Tools and Surfaces
Putty knives, taping knives, and sprayers should be rinsed thoroughly with warm water immediately after use, since dried joint compound and texture residue become significantly harder to remove once they harden on tool surfaces. Wipe down all surfaces in the room, including windowsills, baseboards, and any furniture that remained in the space, to remove any settled dust.
Final Dust Removal
A final pass with a shop vacuum across floors, corners, and any remaining plastic sheeting helps capture lingering dust before you remove your protective coverings.
Once the plastic sheeting is removed, a damp mop or cloth across floors picks up any remaining fine particles, leaving the room genuinely clean and ready for the next stage of the project.
14. Priming and Painting
With your walls smooth, patched, and clean, the final major stage in how to remove texture from walls is priming and painting, which brings the entire project together into a finished, polished result.
Why Priming Matters After Texture Removal
Freshly repaired and sanded drywall tends to absorb paint unevenly, particularly in areas that were patched with joint compound versus areas of original drywall. A quality primer creates a consistent base across the entire surface, which helps your paint color appear even and true, rather than blotchy or inconsistent in different spots.
Choosing the Right Primer and Paint
A standard PVA or drywall primer works well for most texture removal projects, as it is specifically designed to seal porous patched areas and provide a uniform surface for topcoat paint. When it comes to paint, a higher quality paint with a slight sheen, such as eggshell or satin, tends to show far fewer imperfections than flat paint, while also being easier to clean and maintain over time.
Application Tips for a Flawless Finish
Apply primer with a roller for even coverage, using a brush for corners and edges, and allow it to dry fully according to the manufacturer’s instructions before applying your topcoat.
Two coats of paint generally provide the most even, professional-looking result, with light sanding between coats if any texture from the roller nap or dust settled during drying. Taking your time during this final stage genuinely makes a visible difference in the overall quality of your finished walls.
15. Common Mistakes to Avoid
Even with a solid plan in place, there are a handful of mistakes that tend to trip up homeowners tackling this project for the first time.
Skipping the Testing Step
Perhaps the most important mistake to avoid is skipping asbestos and lead testing in older homes. This single oversight carries real health risks and should never be bypassed simply to save time, regardless of how confident you feel about your home’s age or history.
Over-Wetting or Under-Wetting
Applying too much water at once can lead to water damage on floors, walls, and even electrical components, while too little water leaves texture stubbornly attached and increases the risk of gouging the drywall during scraping.
Finding the right balance, working in manageable sections and allowing adequate soak time, makes a significant difference in how smoothly the entire project goes.
Rushing the Scraping Process
Trying to speed through scraping with excessive force is one of the most common causes of drywall damage. Patience and a light, controlled touch consistently produce better results than rushing, even though it may feel slower in the moment.
Not Protecting Floors/Furniture
Skipping proper coverage of floors and furniture, even for what seems like a quick job, often leads to unnecessary cleanup and potential damage. Taking the time to fully prep the room at the start of the project, as outlined earlier in this guide, prevents this frustration entirely.
16. Cost Considerations
Budget is naturally a major factor for most homeowners deciding how to approach texture removal, and costs can vary quite a bit depending on the path you choose.
DIY Cost Breakdown
A DIY texture removal project using the wet scraping method is generally quite affordable, with most of the cost going toward basic supplies like joint compound, sandpaper, plastic sheeting, and possibly a rented sander for larger jobs.
For an average-sized room, total material costs often fall in a relatively modest range, making this one of the more budget-friendly home improvement projects a homeowner can take on.
Professional Removal Costs
Hiring a professional contractor for texture removal typically costs considerably more than the DIY route, since you are paying for labor, expertise, and often faster turnaround time.
Costs are usually calculated per square foot and can vary significantly based on your location, the complexity of the texture, and whether any asbestos abatement is required.
Factors That Affect Pricing
Several factors influence overall project cost, including the size of the area being worked on, the type and thickness of the existing texture, whether asbestos or lead abatement is necessary, and regional labor rates if hiring a professional. The table below offers a general comparison.
| Factor | DIY Cost Impact | Professional Cost Impact |
|---|---|---|
| Room Size | Minimal, mostly material cost | Significant, priced per square foot |
| Texture Thickness | More time, similar material cost | Higher labor cost for thicker texture |
| Asbestos Abatement | Not applicable for DIY, requires professional | Adds substantial cost |
| Tool Rental | Optional, adds modest cost | Included in professional service |
17. DIY vs. Hiring a Professional
Deciding whether to tackle this project yourself or bring in a professional ultimately comes down to your comfort level, available time, and the specific circumstances of your home.
When to DIY
DIY is a great option for homeowners with a reasonable amount of patience, a smaller to moderately sized project, and confirmed test results showing no asbestos or lead present. It is also well suited to those looking to save on labor costs and who do not mind investing a weekend or two into the process.
When to Call a Contractor
Hiring a professional makes the most sense for larger, whole-home projects, situations involving confirmed asbestos or lead that require certified abatement, or simply for homeowners who would rather not deal with the physical labor and mess involved.
Time constraints are another common reason to bring in professional help, particularly for those balancing the project around a busy schedule.
Pros and Cons of Each
| Approach | Pros | Cons |
|---|---|---|
| DIY | Lower cost, full control over pace and process | Time-consuming, physically demanding, learning curve |
| Professional | Faster completion, expert results, handles hazardous materials safely | Higher cost, less control over scheduling |
18. Frequently Asked Questions (FAQ)
How long does texture removal take?
The timeline varies significantly based on room size and texture thickness, but as a general guide, a single average-sized room typically takes a full day to a weekend when using the wet scraping method, including drying and sanding time.
Can you remove texture without water?
Yes, dry sanding is possible, particularly for very light texture, though it tends to be dustier, more physically demanding, and generally less effective than wet scraping for thicker textures.
Is texture removal messy?
It can be, particularly with the wet scraping method, which involves water dripping down walls and wet debris accumulating on floors. Proper preparation, including plastic sheeting and covered furniture, keeps this mess well contained and manageable.
Does removing texture increase home value?
Many real estate professionals suggest that smooth, updated walls can positively influence buyer perception and align with current design trends, which may contribute to a home’s overall appeal and marketability, though actual value impact varies by local market and buyer preferences.
19. Conclusion
Learning how to remove texture from walls is a manageable project once broken into clear steps, from testing for asbestos and lead to scraping, sanding, and painting. Taking time with each stage, especially safety testing and careful scraping, makes the biggest difference in your final result.
Whether you choose DIY or hire a professional, the outcome is the same: smooth, modern walls that transform the whole room. With the right tools and a little patience, you’re fully equipped to get this done well.
Related Articles
Should Curtains Touch the Floor? The Complete Guide to Curtain Length
How To Clean Cork Flooring? A Complete Step-by-Step Guide
How to Cover Up Popcorn Ceiling: 6 Easy Methods for a Modern Look
How to Clean Mold from Bathroom Ceiling: Complete Step-by-Step Guide