


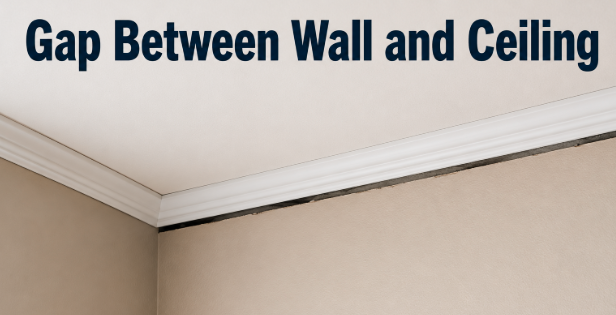
A gap between the wall and ceiling is usually caused by normal wood shrinkage or a seasonal movement pattern called truss uplift, not by a failing foundation. Small gaps, about a quarter inch or less, get filled with flexible caulk.
Wider gaps need joint compound and tape. Gaps that open every winter and close every summer need a repair that lets the ceiling move instead of fighting it.
What causes a gap between the wall and ceiling?
Wood framing shrinks as it dries out after construction, and that shrinkage can pull the drywall tape loose right where the wall meets the ceiling. This is the most common cause in homes under about two years old, since new lumber keeps losing moisture well after the walls are painted.
The second common cause is truss uplift, a seasonal movement in roof trusses. The bottom chord of a truss sits under thick attic insulation, so it stays warm and holds its moisture, while the top chords sit in cold, dry attic air and lose moisture and shrink.
That mismatch makes the truss bow upward slightly in the middle, lifting the ceiling drywall away from interior walls that do not carry roof weight. The gap opens in cold months and closes back up as the seasons warm, which is the clearest sign you are dealing with this rather than something more serious.
A third, less common cause is foundation settling. If the ground under part of the house has shifted, framing can be pulled slightly out of level, opening a gap along with other symptoms in the same area of the house. This is worth ruling out before you assume the gap is cosmetic, which the next section covers.
Less often, the gap is simply a workmanship issue: the drywall was cut a little short of the ceiling line, or a tapered seam was not pre-filled before taping, and the joint tape cracked under normal, minor movement instead of a specific event.
Is the gap a structural problem or something normal?
A gap on its own, especially along an interior wall, is almost always cosmetic. It becomes worth a closer look if it shows up alongside other warning signs in the same part of the house.
- Doors or windows nearby that stick or no longer latch properly
- A floor that feels sloped or bouncy in that area
- New cracks in the foundation, brick veneer, or exterior stucco
- A gap that keeps growing wider month after month instead of following the seasons
- A gap along an exterior, load-bearing wall rather than an interior partition
If you see two or more of these together, have a structural engineer or a qualified home inspector look at the framing before you patch anything. If the gap is isolated to a single interior wall and opens and closes with the seasons, it is truss uplift or ordinary shrinkage, and the repairs below will hold.
How do you fix a small gap (under 1/4 inch)?
For a hairline crack or a gap under about a quarter inch, a flexible acrylic latex caulk works better than joint compound, because caulk stays slightly elastic after it cures and can flex with small seasonal movement instead of cracking again.
- Clean the joint. Scrape away any loose paint, dust, or old cracked caulk with a putty knife, then wipe the area so the new caulk has a clean surface to grip.
- Run painter’s tape along both sides of the gap, about an eighth of an inch back, to keep the line crisp.
- Load a caulk gun with a paintable acrylic latex caulk, such as DAP’s Alex Painter’s caulk, cut the tip small, and run a continuous, even bead into the gap.
- Smooth the bead with a wet finger or a caulk finishing tool before it starts to skin over, usually within two to five minutes.
- Pull the painter’s tape away at a 45 degree angle while the caulk is still soft, then let it cure fully before painting, typically within 30 minutes to a few hours depending on the product.
If the gap is deeper than about half an inch, pack a foam backer rod into the joint first so the caulk only has to bridge a thin layer, not fill the whole depth.
How do you fix a wider or deeper gap?
Once a gap passes about a quarter inch, caulk alone will sag or crack again, and the joint needs the same tape-and-mud approach used on any drywall seam.
- Scrape out any loose or cracked tape and compound so you are working with a clean, sound edge on both the wall and ceiling side.
- Prefill the gap itself with a setting-type joint compound, often called hot mud, rather than standard all-purpose compound. Setting compounds cure by a chemical reaction instead of just drying, so they resist shrinking and cracking in a gap that regular mud would sag into.
- Once the prefill has set, embed paper joint tape (or fiberglass mesh, if you prefer) into a fresh layer of compound, centered directly over the joint, and press out the air bubbles with a taping knife.
- Apply a fill coat once the tape coat has set, feathering it a few inches wider than the tape on each side.
- Apply a final finish coat once the fill coat is dry, feathering it even wider so the repair blends into the surrounding wall and ceiling.
- Sand lightly between coats and after the final coat, then prime and paint to match.
A lightweight setting compound such as USG’s Sheetrock Easy Sand 45 is a common choice for this kind of repair because it sands easily once it has cured, unlike some of the harder-setting formulas.
How do you stop the gap from coming back every year?
If a gap reopens each winter, retaping it the usual way will only buy a season, because the drywall is still rigidly fastened to a truss that keeps moving. The lasting fix is a floating corner, which lets the ceiling edge move without dragging the wall corner with it.
A floating corner works by leaving the last 12 to 18 inches of ceiling drywall near the wall unscrewed from the truss, so that section can flex up and down. The edge of the drywall is then supported by an L-shaped clip or backing angle fastened only to the top plate of the wall, never to the truss itself. As the truss rises and falls with the seasons, the ceiling drywall flexes at that clip instead of tearing the tape loose at the corner.
This is a drywall-off repair, since it usually means cutting back the existing ceiling drywall near the affected walls, installing the clips or backing angle, and re-taping the corner with a flexible approach afterward. It is worth it for a gap that has come back two or three winters in a row, since re-mudding the same joint indefinitely does not fix the underlying movement.
Can you just cover it with molding?
Yes, and for a truss uplift gap that keeps recurring, crown molding is often the simplest practical answer. The trick is fastening it correctly: nail the molding only into the wall studs, never into the ceiling or the truss above it. As the ceiling lifts in winter, the molding stays put on the wall and the ceiling simply slides slightly behind it, so the moving joint is never visible.
Paint the wall surface a few inches above where the molding will sit before you install it. That way, if the ceiling lifts more than usual in a particularly dry winter, you will not see an unpainted stripe peeking out from under the trim.
Do you need a professional, and what does it cost?
Caulking a small, stable gap is a same-afternoon DIY job that costs under 15 dollars in materials. Taping and mudding a wider gap is also within reach for most DIYers, though it takes a few days spread out to let each coat set and dry, and materials typically run 20 to 40 dollars for a single room.
A floating corner repair is a different scale of job. It involves cutting back drywall, installing hardware in the attic or above a finished ceiling, and refinishing the corner, and most homeowners hire a drywall contractor for it.
Expect a range of roughly 300 to 800 dollars per affected wall for a professional repair, depending on ceiling height, access, and how much drywall needs to come down, though a full-house truss uplift correction can run higher.
Conclusion
Most gaps between a wall and ceiling come from ordinary wood shrinkage or seasonal truss uplift, not a structural failure.
Match the fix to the gap: flexible caulk for anything under a quarter inch, tape and setting compound for wider joints, and a floating corner or well-placed crown molding for a gap that keeps reopening every winter.
A good result is a joint that stays smooth and crack-free through at least one full heating and cooling cycle.
Frequently asked questions
Why does the gap only show up in winter?
Cold, dry attic air shrinks the truss’s top chords while the insulated bottom chord stays warm and moist, bowing the truss upward and lifting the ceiling. It closes back up as humidity and temperature even out in warmer months.
Is a gap between the wall and ceiling covered by a new home warranty?
Many builder warranties treat truss uplift as a cosmetic, not structural, issue, and cover it for a limited period, often the first year. Check your specific warranty terms and document the gap with dated photos.
Can I just paint over the crack without repairing it?
Paint alone will not hold a moving joint together and the crack will telegraph through again within a season. The joint needs caulk or tape and compound underneath before painting for the repair to last.
Will spray foam work to fill a large gap?
Spray foam expands unevenly and is hard to trim flush, so it usually leaves a lumpy, hard-to-finish surface. A backer rod with caulk, or hot mud with tape, gives a smoother, more paintable result.
Does truss uplift mean my roof is unsafe?
No. Truss uplift is a cosmetic movement issue caused by moisture and temperature differences in the attic, not a sign of structural weakness in the roof or trusses themselves.
Related Articles
Garage Floor Wet When It Rains: Causes & Fixes
How to Get Rid of Perfume Smell in a Room?
What Is the Average Height of a Door?
How to Overlap Metal Roofing Lengthwise for a Leak-Free Roof?