



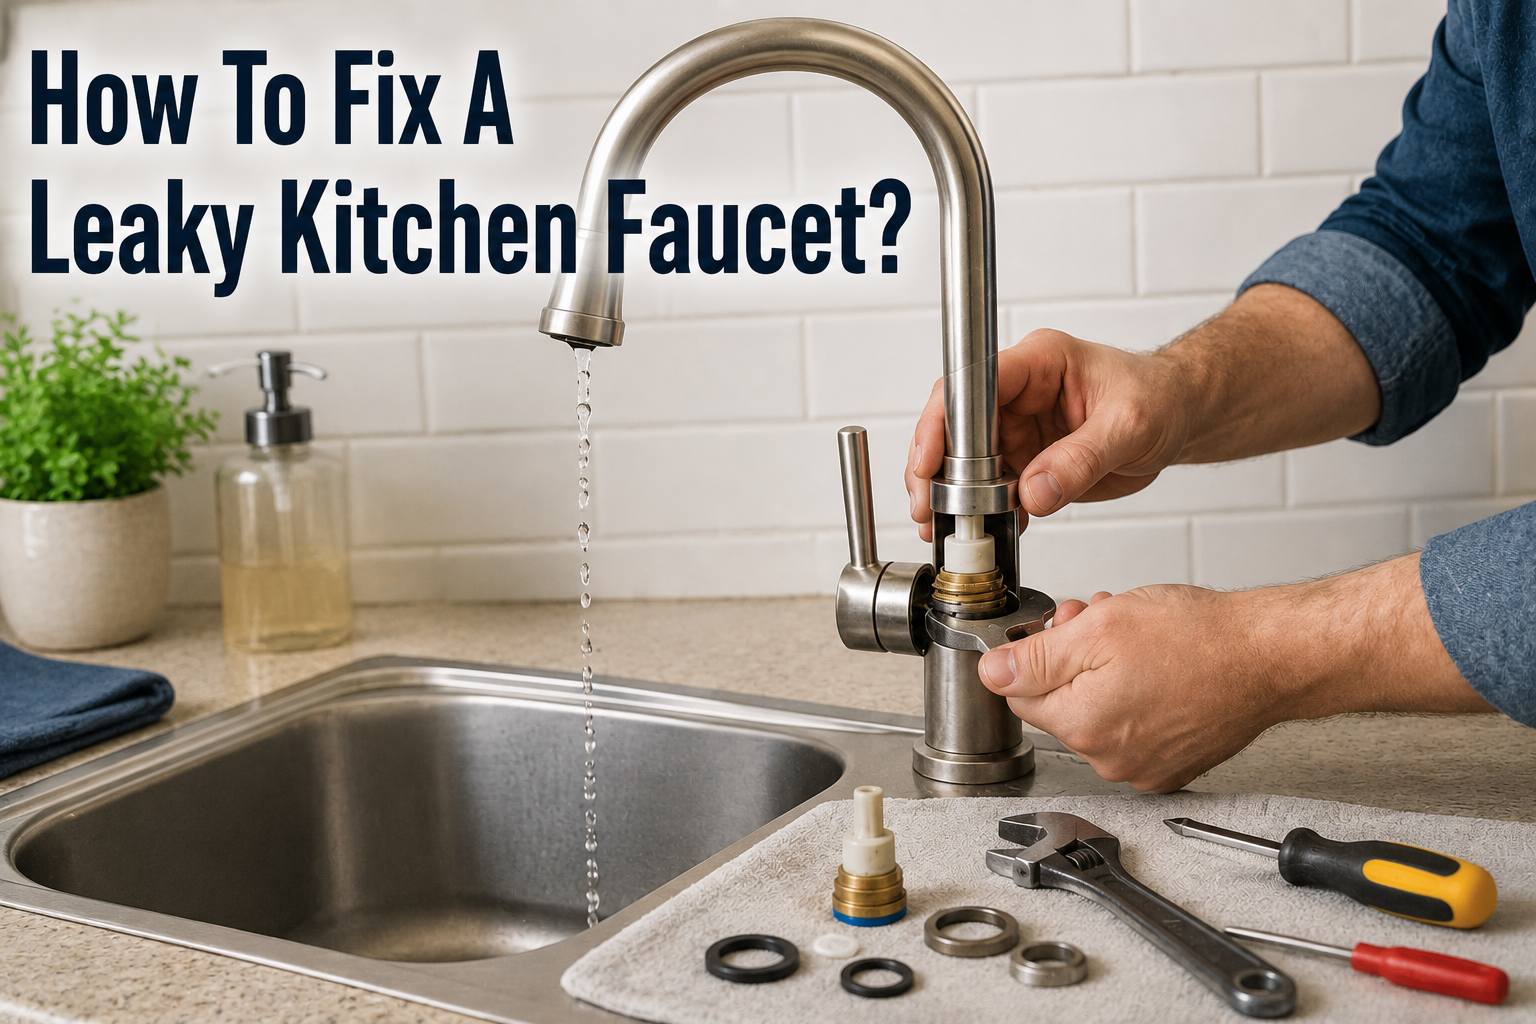
Introduction
A dripping kitchen faucet is one of those small household problems that people tend to ignore for weeks, sometimes even months. It starts as a quiet, occasional drip, but over time it turns into a steady trickle that wastes water, raises utility bills, and can even damage the cabinet or countertop underneath the sink. Understanding how to fix a leaky kitchen faucet is a skill that saves money and prevents long-term water damage in your home.
Faucets leak for many reasons. Rubber parts inside wear down with age, small mineral deposits build up from hard water, and constant use loosens screws and washers that were once tight. None of these problems are unusual, and almost all of them can be fixed without calling a professional plumber.
A single dripping faucet may seem harmless, but the numbers tell a different story. A faucet that drips once every second can waste more than three thousand gallons of water in a single year. That is not just a plumbing inconvenience; it is money going straight down the drain every single day the leak continues.
The good news is that fixing a leaky kitchen faucet is one of the most beginner-friendly plumbing repairs you can take on at home. Most repairs take less than an hour, require only a handful of inexpensive tools, and do not need any advanced technical knowledge. This guide walks through everything from identifying your faucet type to reassembling it after the repair, written in plain and simple language so anyone can follow along.
By the end of this guide, you will know exactly how to fix a leaky kitchen faucet on your own, understand why it started leaking in the first place, and learn how to prevent the same issue from happening again in the future.
Understanding Your Faucet
Common Signs of a Leaky Faucet
Before jumping into repairs, it helps to recognize the early warning signs of a faucet problem. Some leaks are obvious, while others are subtle and only noticed after checking under the sink.
Common signs include:
- A slow drip from the spout even when the handle is fully turned off
- Water pooling around the base of the faucet
- A squeaky or stiff handle that is harder to turn than before
- Water stains or dampness in the cabinet below the sink
- A hissing or whistling sound coming from the faucet
- Reduced water pressure from the spout
If any of these sound familiar, your faucet is likely due for a repair.
Why Identifying the Faucet Type Matters
Not all kitchen faucets are built the same way, and this is the single most important thing to figure out before starting any repair. The internal parts, the tools needed, and the exact repair steps depend entirely on which type of faucet mechanism is installed in your kitchen. Attempting a compression faucet repair on a cartridge faucet, for example, will not work because the internal components are completely different.
The Four Main Types of Kitchen Faucets
There are four common faucet mechanisms found in most homes today. Each one has a distinct internal design, and understanding these differences is the foundation of learning how to fix a leaky kitchen faucet correctly.
| Faucet Type | How It Works | Typical Leak Cause |
|---|---|---|
| Compression | Uses a screw-down stem with rubber washers | Worn-out washer or O-ring |
| Ball | Uses a single handle over a rotating metal or plastic ball | Worn springs, seats, or cam assembly |
| Cartridge | Uses a replaceable cartridge to control water flow | Damaged or worn cartridge |
| Ceramic Disk | Uses two ceramic disks that slide to control flow | Worn neoprene seals or cracked disk |
- Compression faucets are the oldest design and are usually found in older homes, often with two separate handles for hot and cold water.
- Ball faucets became popular in the 1970s and typically have a single handle that moves in multiple directions.
- Cartridge faucets are extremely common in modern kitchens and can have either one or two handles.
- Ceramic disk faucets are considered the most durable and modern option, often recognized by a wide cylindrical body beneath the handle.
How to Identify Which Type You Have
The easiest way to identify your faucet type is to remove the handle and look at the mechanism underneath. If you see a screw-down stem with a rubber washer, it is a compression faucet. A rounded metal or plastic ball indicates a ball faucet.
A removable cylindrical cartridge points to a cartridge faucet. A wide, flat cylinder with two ceramic plates inside signals a ceramic disk faucet. If you are still unsure, checking the manufacturer’s website using your faucet’s model number is a reliable way to confirm the exact type.
Common Causes of Faucet Leaks
Understanding why a faucet leaks in the first place makes the repair process much easier, because it tells you exactly which part needs attention.
Worn-out washers are the most frequent cause of leaks in compression faucets. Every time the handle is turned, the washer presses against the valve seat, and over months or years, this constant friction wears the rubber down until it no longer creates a tight seal.
Damaged O-rings are small rubber rings that seal joints inside the faucet. When they crack or become brittle with age, water can seep out from around the handle or the base of the spout.
Corroded valve seats occur when the connection between the faucet and the spigot wears down, often due to mineral deposits from hard water. This corrosion can cause leaks around the spout area specifically.
Loose parts are a simple but often overlooked cause. Regular use over time can loosen internal screws, and this looseness can lead to water escaping from joints that were previously tight.
Improper installation can cause leaks even in a brand-new faucet if parts were not aligned or tightened to the correct specification during setup.
Mineral and sediment buildup from hard water gradually clogs internal components and aerators, sometimes causing pressure imbalances that lead to dripping.
High water pressure in a home’s plumbing system can put excess stress on internal seals, causing them to fail earlier than expected.
Tools and Materials Needed
Gathering the right tools before starting saves time and prevents frustrating mid-repair trips to the hardware store.
Basic Toolkit Checklist
| Tool | Purpose |
|---|---|
| Adjustable wrench | Loosening and tightening nuts |
| Allen wrench set | Removing handle set screws |
| Screwdriver (flathead and Phillips) | Removing handles and covers |
| Needle-nose pliers | Gripping small parts |
| Plumber’s tape (Teflon tape) | Sealing threaded connections |
| Old towel or rag | Protecting the sink surface and catching drips |
| Flashlight | Seeing clearly under the sink |
Replacement Parts to Have on Hand
The exact replacement parts depend on the faucet type identified earlier, but it is wise to have a few common items ready before starting:
- Rubber washers (assorted sizes)
- O-rings (assorted sizes)
- A repair kit matching your faucet brand and model
- Plumber’s grease for lubricating parts during reassembly
Where to Buy the Right Repair Kit
Most hardware stores carry universal repair kits, but for the best fit, it is worth checking the faucet manufacturer’s website using the model number, which is often printed on the underside of the faucet or found in the original packaging documentation. Buying an exact match reduces the chance of the leak returning shortly after the repair.
Safety Gear Recommendations
While this is a low-risk repair, wearing simple rubber gloves keeps hands clean and dry, and safety glasses are useful if there is a chance of a small water spray when the shutoff valve is first opened again.
Preparation Before You Start
Preparation is often the step people skip, yet it is the step that prevents most repair mistakes.
Shutting Off the Water Supply
Locate the shutoff valves under the sink, usually two separate valves for hot and cold water. Turn both clockwise until they stop moving. This step is non-negotiable, since skipping it will cause water to spray out the moment the faucet is disassembled.
Releasing Pressure from the Line
After shutting off the valves, turn the faucet handle to the “on” position briefly to release any remaining water pressure trapped in the pipes. This prevents unexpected spurts of water during disassembly.
Plugging the Drain
Small screws, washers, and springs are easy to drop and even easier to lose down the drain. Plugging the sink drain with a stopper or a cloth before starting protects these tiny parts.
Laying Out a Towel and Workspace Setup
Placing a towel in the sink basin protects the surface from scratches caused by tools or metal parts, and it also gives you a clean, organized space to lay out each piece as it comes apart.
Taking Photos Before Disassembly
Taking a few photos of the faucet before removing anything is a simple habit that prevents confusion later. Reassembling a faucet correctly is much easier when you have a visual reference of how each part originally fit together.
Step-by-Step Fix by Faucet Type
This is the core section for anyone wondering exactly how to fix a leaky kitchen faucet based on their specific mechanism.
Fixing a Compression Faucet
Removing the Handle Use a screwdriver or Allen wrench to remove the small screw hidden under the decorative cap on top of the handle. Once the screw is out, gently lift the handle off.
Replacing the Washer and O-ring Underneath the handle, you will find a stem held in place by a packing nut. Unscrew this nut with an adjustable wrench, then pull out the stem. At the bottom of the stem is a small rubber washer held by a brass screw. Remove this screw, replace the washer with an identical size, and check the O-ring around the stem for cracking, replacing it if necessary.
Reassembling Slide the stem back into place, tighten the packing nut, reattach the handle, and secure the screw and decorative cap.
Fixing a Ball Faucet
Disassembling the Ball Mechanism Loosen the set screw on the handle using an Allen wrench, then remove the handle to expose the cap and collar underneath. A specialized ball-faucet wrench, often included in repair kits, helps loosen the cap.
Replacing Springs, Seats, and Cam Lift out the ball assembly along with the cam, cam washer, and rotating ball. Underneath, small rubber seats and springs sit inside the faucet body. Replace these seats and springs, then insert a new ball if the old one shows visible wear or scratching.
Reassembling Place the cam and cam washer back in their original alignment, reattach the cap, and secure the handle with its set screw.
Fixing a Cartridge Faucet
Removing the Cartridge Pop off the decorative cap, remove the screw underneath, and lift the handle away. Unscrew the retaining nut or clip holding the cartridge in place, then pull the old cartridge straight out.
Selecting the Correct Replacement Cartridge Cartridges are not universal, so matching the exact brand and model is essential. Bringing the old cartridge to the hardware store is the safest way to find an identical replacement.
Installing and Testing Insert the new cartridge in the same orientation as the old one, secure the retaining nut or clip, and reattach the handle.
Fixing a Ceramic Disk Faucet
Accessing the Disk Cylinder Remove the handle by loosening its set screw, then lift out the cylindrical disk assembly from the faucet body.
Cleaning vs. Replacing Seals Sometimes a leak in this faucet type is caused by mineral buildup rather than a worn part. Soaking the disk cylinder in a mild vinegar solution can dissolve deposits. If cleaning does not solve the issue, replace the neoprene seals at the base of the cylinder, or replace the entire disk cylinder if it appears cracked.
Reassembling and Testing Place the cylinder back into the faucet body in its original position, reattach the handle, and tighten the set screw.
Testing and Troubleshooting
Turning Water Back On Safely
Turn the shutoff valves counterclockwise slowly rather than all at once. This gradual approach allows air trapped in the pipes to escape without causing a sudden burst of pressure.
Checking for Leaks
With the water running, check three key areas: the base of the faucet, the handle itself, and the connection point between the spout and the body. Run both hot and cold water for a minute to be sure.
What to Do if the Leak Continues
If the drip continues after replacing the expected part, the issue may be a part that was overlooked, such as the O-ring, or a part that was installed slightly misaligned during reassembly. Disassembling and checking the alignment often resolves this.
When a Small Drip Means a Bigger Problem
A persistent leak despite multiple part replacements can sometimes indicate a cracked faucet body or damaged internal threading, which usually cannot be repaired and instead points toward a full faucet replacement.
Preventive Maintenance Tips
Preventing future leaks is just as important as fixing the current one.
- Inspect the faucet every few months for early signs of dripping or stiffness
- Clean the aerator regularly by unscrewing it and soaking it in vinegar to remove mineral deposits
- Avoid overtightening the handle when turning off the water, since excessive force wears down washers faster
- Consider a water softener if hard water is a recurring issue in your area
- Replace the entire faucet if it is older than fifteen years and leaks repeatedly despite repairs, since parts availability and wear across the whole unit become larger issues at that age
When to Call a Professional
Signs the Problem Is Beyond a Simple Fix
If water is leaking from inside the wall, if there is significant water damage to cabinetry, or if the faucet body itself is cracked, it is time to call a licensed plumber rather than continuing with a DIY approach.
Cost Comparison: DIY vs. Plumber
| Approach | Typical Cost Range | Time Required |
|---|---|---|
| DIY repair with a kit | Low cost of parts only | 30 to 60 minutes |
| Professional plumber visit | Moderate to higher cost including labor | Varies, often same day |
Questions to Ask a Plumber
Before hiring a plumber, ask whether the repair includes a warranty, whether replacement parts are included in the quoted price, and whether a full faucet replacement would be more cost-effective than another repair.
Frequently Asked Questions (FAQ)
How much does it cost to fix a leaky faucet? Most repairs cost very little since replacement washers, O-rings, and cartridges are inexpensive. The main cost is the initial repair kit, which is far cheaper than hiring a plumber for a similar job.
How long does the repair take? For most faucet types, the entire process from shutting off the water to testing the fix takes between thirty minutes and one hour, even for beginners.
Can a leaky faucet increase my water bill significantly? Yes. A continuously dripping faucet can waste thousands of gallons of water over a year, which adds a noticeable and unnecessary amount to a water bill.
Do all faucet brands use the same parts? No. Parts vary by brand and model, which is why identifying the faucet type and bringing the old part to the store when buying replacements is strongly recommended.
Is it normal for a new faucet to leak? It can happen if the faucet was not installed correctly or if a factory part was defective. In such cases, checking the installation alignment or contacting the manufacturer for a replacement part is the right next step.
Conclusion
Learning how to fix a leaky kitchen faucet is a practical skill that saves money, conserves water, and prevents long-term damage to your kitchen. By identifying the faucet type, gathering the right tools, and following the correct steps for that specific mechanism, most homeowners can complete this repair confidently without professional help.
Taking the time to understand the root cause of the leak, whether it is a worn washer, a damaged O-ring, or mineral buildup, ensures the fix lasts rather than needing to be repeated a few weeks later. With a little patience and the steps outlined in this guide, a persistent kitchen faucet drip can be resolved in under an hour.
As a final reminder, always shut off the water supply completely before starting any repair, and take your time during reassembly to make sure every part is aligned correctly. A careful, methodical approach is what separates a lasting repair from one that needs to be redone.
Related Articles
How to Unclog a Kitchen Sink: 8 Easy DIY Methods That Actually Work
How To Remove Texture From Walls: The Complete Step-by-Step Guide
Should Curtains Touch the Floor? The Complete Guide to Curtain Length
How To Clean Cork Flooring? A Complete Step-by-Step Guide
How to Cover Up Popcorn Ceiling: 6 Easy Methods for a Modern Look