


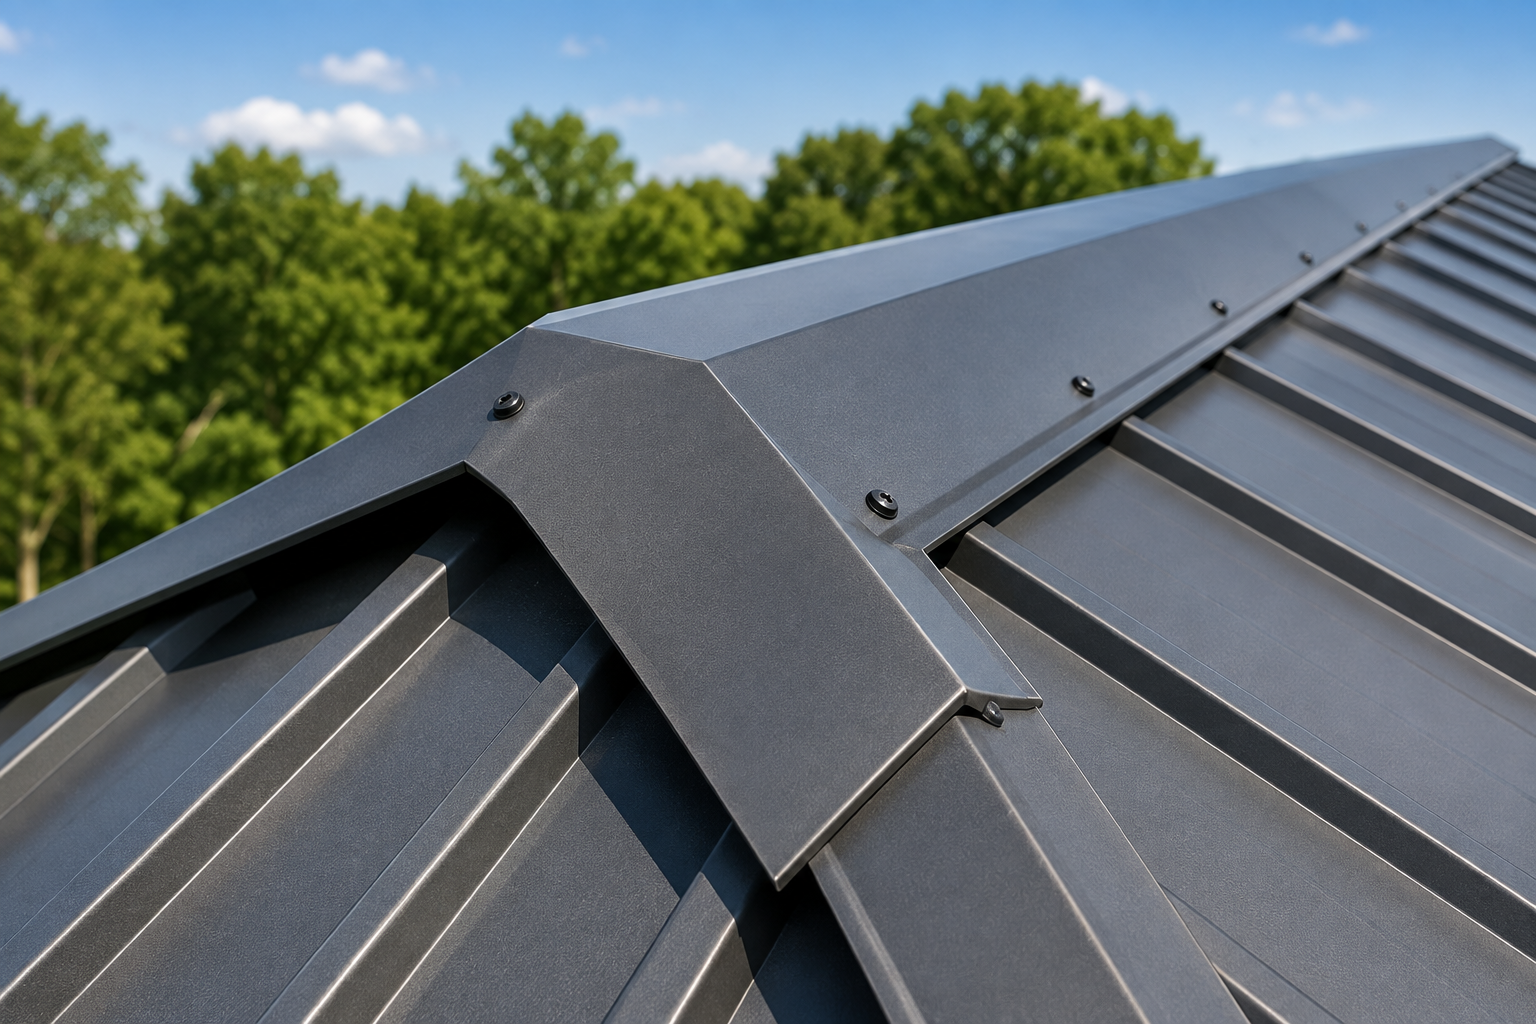
If you’ve ever looked closely at a metal roof, you’ve probably noticed a raised piece running along the very top where two roof slopes meet. That piece is called a metal roof ridge cap, and even though it looks small compared to the rest of the roof, it plays a huge role in keeping your home safe and dry. Without a properly installed ridge cap, rain, wind, snow, and even small critters could easily sneak into your attic through the gap at the peak of your roof.
In this guide, we’ll walk through everything you need to know about metal roof ridge caps — what they are, why they matter, the different types available, how they’re installed, and how to keep them in good shape for years to come. Whether you’re a homeowner planning a new roof, a DIY enthusiast, or someone just trying to understand a repair estimate, this article will break it all down in simple, easy-to-follow language.
What Is a Roof Ridge? (Basic Terminology)
Before diving into ridge caps, it helps to understand what a “ridge” actually is. The ridge is the horizontal line at the very top of a roof where two sloped sides come together, forming a peak. Think of it like the spine of a book — it’s the highest point of the roof structure.
It’s easy to confuse the ridge with other roof features, so here’s a quick comparison:
| Roof Feature | Description | Location |
|---|---|---|
| Ridge | The horizontal peak where two slopes meet | Top of the roof |
| Hip | A sloped edge where two roof planes meet at an angle | Corners of a hip roof |
| Valley | The inward-angled line where two slopes meet, forming a “V” | Where two roof sections join at a low point |
The ridge is particularly vulnerable to the elements because it’s the highest and most exposed part of the roof. Wind, rain, and snow all tend to hit this area the hardest, which is exactly why the ridge cap exists — to protect this critical seam.
What Does a Ridge Cap Do?
A metal roof ridge cap isn’t just a decorative finishing touch — it serves several important, practical functions.
Sealing the joint between two roof slopes. When two panels of metal roofing meet at the peak, there’s naturally a gap or seam. Without covering, this gap would allow water to seep directly into the attic space. The ridge cap bridges this gap and creates a watertight seal.
Protecting against rain, wind, snow, and debris. Because the ridge sits at the highest point of the roof, it takes the brunt of weather exposure. A properly fitted cap keeps wind-driven rain from being pushed sideways into the seam, and it also blocks leaves, twigs, dust, and small animals from finding their way inside.
Supporting roof ventilation. Many modern metal roofs use a vented ridge cap paired with a ridge vent system. This setup allows hot, humid air trapped in the attic to escape naturally while still keeping rain and pests out — helping regulate indoor temperature and reduce moisture buildup.
Improving the overall appearance of the roof. Beyond function, ridge caps also give the roofline a clean, finished look. Many homeowners choose a cap that either matches their roof color for a seamless appearance or contrasts with it for a bit of visual style.
Types of Metal Roof Ridge Caps
Not all ridge caps are the same. Depending on your roof design, ventilation needs, and aesthetic preference, you’ll find several types on the market.
Standard solid ridge cap. This is the most common type — a simple, solid metal piece that covers the ridge without any ventilation function. It’s ideal for roofs that already have ventilation elsewhere, such as gable vents or soffit vents.
Vented ridge cap. This type includes small perforations or a mesh insert that allows air to flow out of the attic while still blocking rain and debris. It’s a popular choice for homes that rely on ridge ventilation as their main airflow system.
Rolled/formed vs. corrugated ridge caps. Rolled or formed caps have smooth, gentle curves and are often used with standing-seam metal roofs. Corrugated ridge caps are shaped to match wavy or ribbed metal panels, ensuring a snug fit with no gaps.
Material-based variations. Ridge caps also vary by the metal they’re made from — steel, aluminum, copper, and galvalume being the most common (we’ll cover these in detail in the next section).
Color-matched vs. contrasting caps. Some homeowners prefer their ridge cap to blend in seamlessly with the rest of the roof, while others like a contrasting color to create a bold accent line along the roofline.
Materials Used in Ridge Caps
The material of your ridge cap affects its durability, cost, and appearance. Here’s a simple breakdown of the most common options.
| Material | Durability | Cost | Best For |
|---|---|---|---|
| Galvanized Steel | High (with proper coating) | Moderate | Most residential and commercial roofs |
| Aluminum | Very high, rust-resistant | Moderate to high | Coastal homes exposed to salt air |
| Copper | Extremely long-lasting, develops patina | High | High-end or historic homes |
| Stone-Coated Steel | High, adds texture and color | Moderate to high | Homes wanting a tile or shingle look |
Galvanized steel is popular because it’s strong, affordable, and holds up well when properly coated with zinc to resist rust. Aluminum is a favorite in coastal areas since it naturally resists corrosion from salty, humid air. Copper is a premium option — it costs more upfront, but it can last well over 50 years and develops an attractive greenish patina over time. Stone-coated steel combines the strength of metal with a textured finish that mimics traditional roofing materials.
How Ridge Caps Are Installed
Installing a metal roof ridge cap is a precise job that requires the right tools and careful attention to detail. Here’s a general step-by-step overview of how professionals typically approach it.
Tools and materials needed:
- Ridge cap panels (matching your roofing material)
- Closure strips or foam fillers
- Corrosion-resistant screws or fasteners
- Sealant/caulk
- Tin snips or metal shears
- Drill or screw gun
- Tape measure and chalk line
Step-by-step installation process:
- Measure the ridge length carefully to determine how many cap sections you’ll need, allowing for overlap.
- Install closure strips or foam fillers along the ridge line first. These fill the small gaps between the ridge cap and the roof panels, blocking wind and rain while still allowing airflow if using a vented system.
- Position the first ridge cap panel at one end of the ridge, making sure it’s aligned straight and centered over the peak.
- Fasten the panel using corrosion-resistant screws, spaced according to the manufacturer’s recommendations (usually every 12 to 18 inches).
- Overlap the next panel by several inches over the previous one, following the direction of prevailing winds in your area to prevent water from being pushed underneath.
- Apply sealant at seams and fastener points for extra protection against leaks.
- Repeat the process down the length of the ridge until fully covered.
- Inspect the finished installation for gaps, loose fasteners, or misalignment.
Proper overlap and spacing are especially important — if panels aren’t overlapped correctly or fasteners are spaced too far apart, wind can lift the cap over time, leading to leaks or complete blow-offs during storms.
Ridge Cap vs. Ridge Vent: What’s the Difference?
These two terms are often confused, but they serve different purposes.
A ridge cap is the metal covering itself — the physical piece that protects the seam at the roof’s peak. A ridge vent is a ventilation component, often installed underneath or integrated with the ridge cap, that allows hot air and moisture to escape from the attic.
In many modern roofing systems, the two work together: the ridge vent creates an opening for airflow, and the vented ridge cap sits on top, allowing air out while keeping rain, snow, and pests from getting in. If your home doesn’t have adequate attic ventilation elsewhere, combining a ridge vent with your ridge cap can significantly improve energy efficiency and reduce moisture-related problems like mold or wood rot.
Common Problems With Ridge Caps
Even a well-installed ridge cap can run into issues over time. Here are some of the most frequent problems homeowners encounter.
Leaks at the ridge. This is usually the result of worn-out sealant, loose fasteners, or improperly overlapped panels. Even a small gap at the ridge can let water trickle into the attic during heavy rain.
Wind uplift and blow-offs. Because the ridge is the highest point of the roof, it experiences the strongest wind forces. If fasteners are too sparse or the cap wasn’t installed with the correct overlap direction, strong winds can pry it loose.
Rust or corrosion. Lower-quality steel or damaged protective coatings can lead to rust spots over time, especially in humid or coastal climates.
Improper fastening or spacing. DIY installations or rushed professional jobs sometimes skip proper spacing guidelines, weakening the cap’s ability to withstand weather stress.
Pest or debris intrusion. Gaps caused by poor closure strip installation can become an entry point for insects, birds, or rodents looking for shelter.
Signs Your Ridge Cap Needs Repair or Replacement
It’s a good idea to keep an eye out for warning signs that your ridge cap may need attention:
- Visible rust spots or discoloration along the ridge line
- Loose, missing, or backed-out fasteners
- Water stains or damp spots on your attic ceiling
- Gaps or misalignment visible from the ground or a ladder
- Cap sections that appear lifted or shifted after a storm
Catching these issues early can save you from costly interior water damage down the road.
Maintenance Tips for Metal Ridge Caps
A little regular upkeep goes a long way in extending the life of your ridge cap. Consider the following maintenance habits:
- Inspect your roof at least twice a year — ideally in spring and fall — and after any major storm.
- Clear away debris like leaves, branches, or dirt that can trap moisture against the metal.
- Reseal or re-caulk any seams that look dried out, cracked, or worn.
- Check fasteners annually to make sure none have loosened or corroded.
- Look for rust early and address small spots before they spread.
These simple checks can be done yourself with a stable ladder and a clear view of the roofline, though hiring a roofing professional for a more thorough inspection every couple of years is also a smart move.
Cost Considerations
The cost of a metal roof ridge cap depends on several factors, including material, roof size, and whether you hire a professional. Here’s a general cost overview:
| Cost Factor | Estimated Range |
|---|---|
| Material cost (per linear foot) | $3 – $12 |
| Professional installation (labor, per linear foot) | $5 – $15 |
| Total project cost (average home) | $300 – $1,200 |
| Premium materials (copper, custom colors) | Higher end of range or beyond |
Keep in mind these are general estimates, and actual pricing will vary based on your location, roof complexity, and the contractor you choose. Vented ridge caps and premium materials like copper will generally push costs toward the higher end.
DIY vs. Hiring a Professional
Whether you should install or repair a ridge cap yourself depends on your comfort level, experience, and the complexity of your roof.
DIY installation may be feasible for simple, low-slope roofs and for homeowners who are comfortable working at heights and have some roofing experience. It can save on labor costs, but mistakes in fastening, sealing, or overlap direction can lead to leaks that are expensive to fix later.
Hiring a professional is generally recommended for steep roofs, complex ridge lines, or if you’re integrating a ridge vent system. Professionals bring the right tools, safety equipment, and experience to ensure the job is done correctly the first time — which often saves money in the long run by preventing future leak repairs.
Choosing the Right Ridge Cap for Your Roof
When selecting a ridge cap, a few key factors should guide your decision:
Matching roof profile and material. Your ridge cap should be compatible with the shape and material of your existing roof panels — corrugated, standing seam, or ribbed profiles all require slightly different cap shapes.
Climate considerations. If you live in a high-wind area, look for ridge caps rated for higher wind resistance and ensure proper fastening. In coastal regions, corrosion-resistant materials like aluminum are a smart choice. In snowy climates, a solid, well-sealed cap helps prevent ice and meltwater infiltration.
Manufacturer recommendations. Always check the roofing manufacturer’s specifications for compatible ridge cap products, as mismatched components can void warranties or reduce performance.
Frequently Asked Questions (FAQs)
How long do metal ridge caps last? With proper installation and maintenance, a quality metal ridge cap can last as long as the roof itself — often 30 to 50 years, depending on the material.
Can I install a ridge cap myself? Yes, if you have roofing experience and are comfortable working at heights. However, professional installation is recommended for more complex or steep roofs to avoid costly mistakes.
Do all metal roofs need a ridge cap? Yes. Every metal roof with a peak needs some form of ridge cap to seal the joint and protect against water intrusion, regardless of roof style.
What’s the best material for coastal areas? Aluminum is generally the best choice for coastal homes due to its natural resistance to salt-air corrosion.
Conclusion
The metal roof ridge cap might be a small part of your roofing system, but it plays an outsized role in keeping your home protected from the elements. From sealing the vulnerable peak of your roof to supporting proper ventilation, a well-installed and well-maintained ridge cap can prevent leaks, extend the life of your roof, and give your home a clean, finished appearance.
If you’re planning a new roof installation or noticing signs of wear on your current ridge cap, don’t wait until small issues turn into costly repairs. Schedule a roof inspection, choose materials suited to your climate, and when in doubt, consult a roofing professional to ensure the job is done right the first time.
Related Articles
How to Clean Mold from Bathroom Ceiling: Complete Step-by-Step Guide
How To Raise Water Level In Toilet Bowl? Complete DIY Fix Guide
How to Put Up Ceiling Tiles: A Step-by-Step Guide
French Drain Basement Systems: The Complete Homeowner’s Guide