


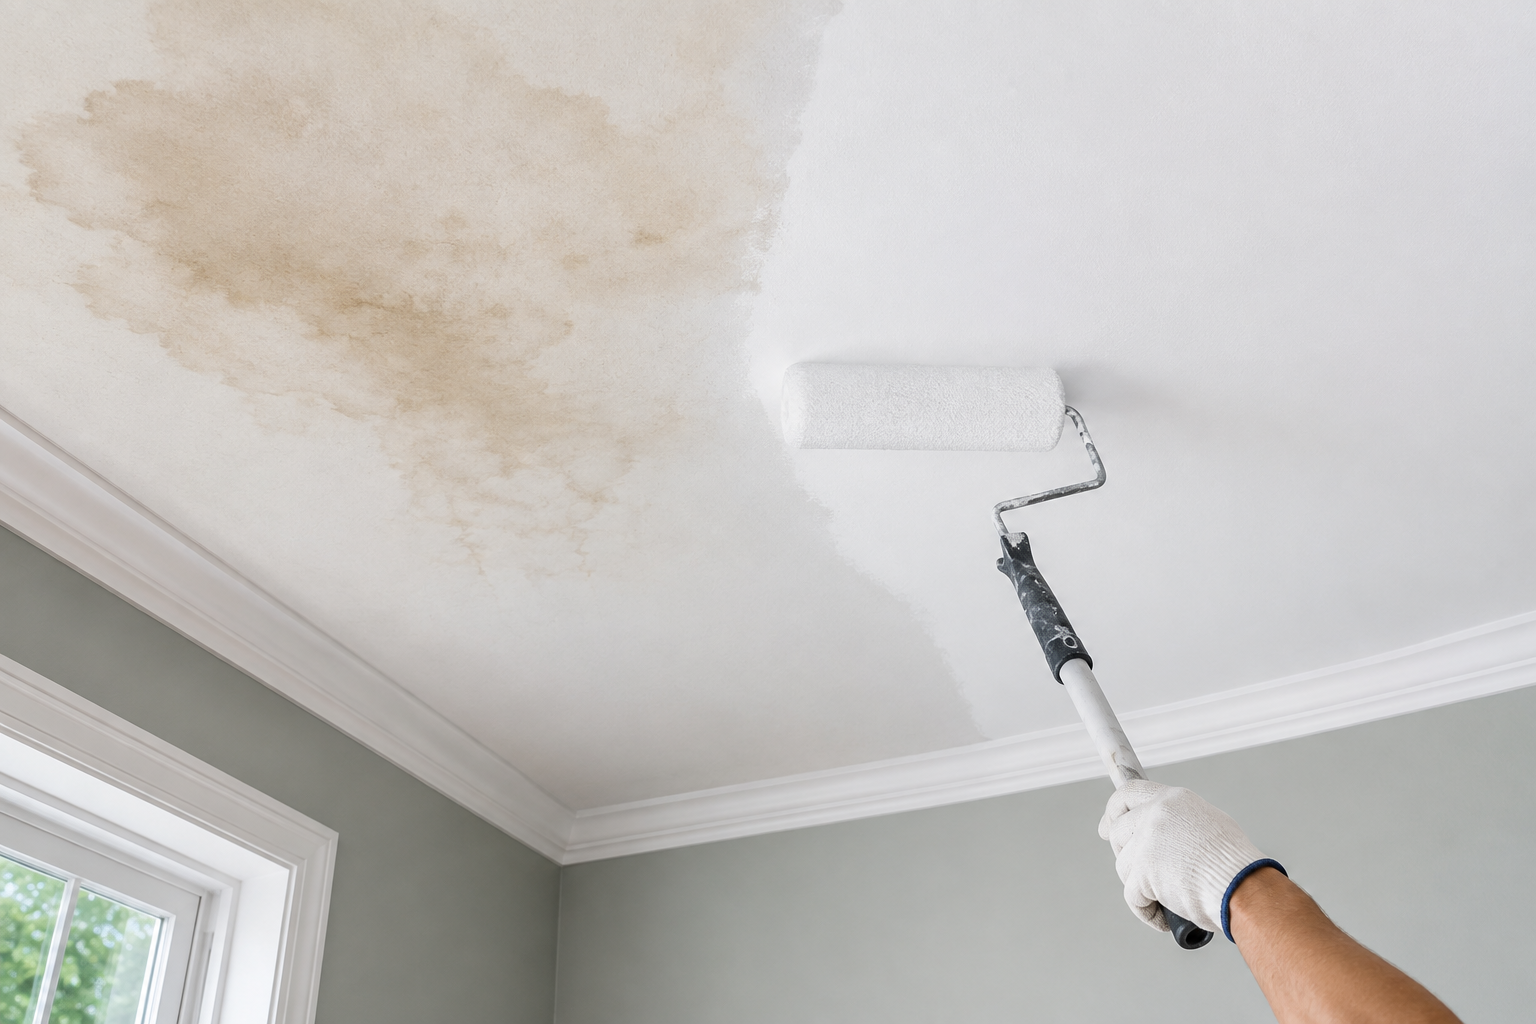
A yellow-brown ring staring down from the ceiling is one of those small household problems that somehow feels bigger than it is. Most homeowners’ first instinct is to grab a roller and a can of white paint and cover it up as quickly as possible. Unfortunately, that quick fix rarely works. Anyone who has tried to paint over a water stain on ceiling surfaces with ordinary paint knows the frustrating result: within a day or two, the stain creeps right back through the fresh coat, sometimes even darker than before.
The reason this happens is simple chemistry, not bad luck. Water stains contain tannins, minerals, and sometimes soot or nicotine residue that are soluble in water. Regular latex ceiling paint is water-based, so when you roll it over a stain, the moisture in the paint reactivates those compounds and pulls them straight to the surface again. To truly fix the problem, the stain has to be sealed off before any topcoat goes on.
This guide walks through the entire process from start to finish, including why the stain appeared in the first place, how to prepare the ceiling properly, which primers actually block stains, and how to apply paint so the repair blends in seamlessly. By the end, you will know exactly how to paint over a water stain on ceiling drywall or plaster so it stays covered for good.
Understanding Water Stains on Ceilings
Common Causes
Ceiling stains rarely appear out of nowhere. They are almost always a sign that water traveled through a space it should not have. A roof leak is one of the most frequent culprits, especially after heavy rain, damaged shingles, or clogged gutters that let water back up under the roofline.
Plumbing problems are another common source, particularly when a bathroom, kitchen, or laundry room sits directly above the stained ceiling; a slow supply line leak or a cracked drain pipe can drip for weeks before anyone notices. Condensation is a quieter cause.
Poorly insulated attics, bathroom fans that vent into the attic instead of outside, or HVAC ducts that sweat in humid weather can all leave a slow ring of moisture on the ceiling below. Occasionally, an appliance such as a washing machine or water heater on an upper floor is to blame.
Old and Dry Versus Active Stains
Before doing anything cosmetic, it is worth figuring out whether the stain is old and dry or part of an ongoing leak. A dry stain usually looks flat, has hard edges, and does not change in size or darkness over a few days of observation.
An active stain often has a soft or slightly swollen texture, may feel cool or damp to the touch, and tends to grow a little wider or darker after rain or heavy appliance use. Pressing gently on the area with a gloved finger can help; if the drywall feels soft or spongy, moisture is still present.
Why Stains Bleed Through Regular Paint
As mentioned earlier, the tannins and mineral salts left behind by water are water-soluble. A standard latex ceiling paint is roughly 30 to 50 percent water by volume, and that water is enough to dissolve the old residue and carry it up through the new paint film as it dries.
This is why so many people who try to simply paint over a water stain on ceiling surfaces without any prep end up with a faint yellow shadow reappearing within a day, sometimes even after two coats.
Before You Start Painting: Fix the Root Cause
Why the Leak Comes First
Painting over a stain without addressing the source is a bit like changing a bandage without treating the wound underneath. If the leak is still active, the new paint will bubble, peel, or stain again within weeks. Tracking down and repairing the source, whether it is a roof, a pipe, or a ventilation issue, has to happen before any cosmetic work begins.
Checking Whether the Area Is Still Wet
A simple touch test is usually enough for a rough assessment: press the stained area with a gloved hand and note whether it feels damp, soft, or cool compared to the surrounding ceiling. For a more reliable reading, an inexpensive pin-type or pinless moisture meter, available at most hardware stores, can confirm whether moisture levels are elevated. Readings that stay consistently above the surrounding drywall over a few days point to an active source.
DIY Fix or Call a Professional
Some leaks are well within reach of a confident DIYer, such as tightening a loose supply line or resealing a bathtub. Others, particularly roof flashing issues, structural leaks, or anything involving electrical wiring near the moisture, are safer left to a licensed roofer, plumber, or contractor. When in doubt, a professional inspection is a small cost compared to repeated ceiling damage.
Letting the Ceiling Dry Completely
Once the source is fixed, the ceiling needs time to dry all the way through, not just on the surface. Depending on humidity and airflow, this can take anywhere from a few days to two weeks. Running a fan or dehumidifier in the room speeds things up. Painting over a ceiling that is still damp underneath traps moisture, which can lead to mold growth or renewed staining later.
Tools and Materials Needed
Gathering everything ahead of time makes the project go smoothly and avoids mid-job trips to the hardware store.
| Category | Items |
|---|---|
| Safety gear | Safety goggles, dust mask or respirator, old clothes |
| Surface protection | Drop cloths, painter’s tape |
| Cleaning supplies | Mild dish detergent, water, diluted bleach solution (for mold) |
| Prep tools | Scraper, fine-grit sandpaper, joint compound (if needed) |
| Primer | Oil-based, shellac-based, or stain-blocking latex primer |
| Paint | Ceiling paint, typically flat or matte finish |
| Application tools | Angled brush, roller with extension pole, paint tray, stepladder |
Step-by-Step Preparation Process
Clear and Protect the Space
Move furniture out of the room or gather it in the center and cover it with a drop cloth. Lay additional drop cloths along the floor and cover any wall areas close to the ceiling with painter’s tape to keep drips contained.
Clean the Stained Area
Wipe the stain down with a rag dampened in mild detergent and water to remove surface dirt, dust, and grease. This step helps the primer bond properly and gives a clearer look at the true condition of the drywall underneath.
Check for Mold
If the stain has a dark, speckled, or fuzzy texture, mold may be present rather than just mineral residue. A diluted bleach solution (roughly one part bleach to three parts water) can be used to treat small surface mold spots, applied with good ventilation and gloves. Larger or spreading mold patches are a signal to bring in a professional for testing and remediation before continuing.
Scrape Off Peeling or Bubbled Paint
Any paint that has bubbled, flaked, or lifted away from the water damage needs to come off. Use a scraper to gently remove loose material, working outward from the center of the stain until you reach solid, well-adhered paint.
Sand the Area Smooth
Lightly sand the scraped area and its edges with fine-grit sandpaper so the transition between old and repaired surface is smooth rather than stepped. This prevents the primer and paint from showing a visible ridge once dry.
Repair Cracks or Damaged Drywall
If water exposure has left cracks, sagging, or crumbling drywall, patch the area with joint compound, let it dry fully, and sand it flush before moving on. Severely damaged sections of drywall may need to be cut out and replaced rather than patched.
Applying Stain-Blocking Primer
Why Primer Is Not Optional
This is the single most important step when learning how to paint over a water stain on ceiling drywall correctly. A stain-blocking primer creates a physical barrier that locks in the tannins and residue, preventing them from dissolving into the topcoat. Skipping this step is the number one reason stains reappear after painting.
Comparing Primer Types
| Primer Type | Pros | Cons |
|---|---|---|
| Oil-based | Excellent stain blocking, very durable | Strong odor, longer dry time, needs mineral spirits for cleanup |
| Shellac-based | Fastest drying, seals odors and stains extremely well | Strong smell, harder to clean up, flammable |
| Water-based stain-blocking latex | Low odor, easy soap-and-water cleanup, faster overall project | Slightly less effective on severe or dark stains |
For light to moderate stains, a water-based stain-blocking primer is often enough. For dark, old, or smoke-tinged stains, an oil-based or shellac-based product tends to give more reliable, permanent coverage.
How to Apply Primer Correctly
Apply the primer with a brush around the edges of the stain first, then use a roller to cover the rest of the area, extending several inches beyond the visible stain in every direction. This buffer zone helps avoid a visible outline once the ceiling paint goes on.
Apply an even coat without over-brushing, and allow it to dry according to the manufacturer’s instructions, which is typically 30 minutes to a few hours depending on the product.
How Many Coats Are Needed
Most stains are fully blocked with a single coat of a quality stain-blocking primer. However, older or particularly dark stains sometimes need a second coat after the first has dried completely, especially if any discoloration is still visible through the primer.
Common Mistakes to Avoid
A few missteps show up again and again in DIY ceiling repairs: using a regular all-purpose primer instead of a stain-blocking formula, applying primer too thinly so the stain shows through, skipping the buffer zone around the stain’s edges, and painting the topcoat before the primer has fully cured.
Painting the Ceiling
Choosing the Right Paint
Ceiling paint is typically sold in a flat or matte finish because it hides surface imperfections better than glossier sheens and reduces light reflection. When color-matching an existing ceiling, bring a small paint chip or sample to the store, or use a color-matching service if the original paint brand and shade are unknown.
Cutting In and Rolling
Start by cutting in around the edges of the repaired area and along the wall-ceiling line with an angled brush. Then use a roller with an extension pole to fill in the larger surface, working in overlapping W-shaped or N-shaped strokes to avoid visible roller lines.
How Many Coats of Paint
Two coats of ceiling paint are usually needed for even, uniform coverage, particularly if the surrounding ceiling has aged slightly compared to the fresh primer and paint over the repaired section.
Drying Time Between Coats
Most ceiling paints need two to four hours of drying time between coats, though this varies by product and humidity levels. Checking the paint can’s label for exact recommendations helps avoid lifting or streaking from painting too soon.
Preventing Future Water Stains
Roof and Gutter Maintenance
Inspecting the roof for damaged or missing shingles once or twice a year, along with keeping gutters and downspouts clear of debris, goes a long way toward preventing water from finding its way into the attic and ceiling.
Checking Plumbing and Appliances
Periodically inspecting visible pipes, supply lines, and appliance connections for slow leaks or corrosion can catch small problems before they become ceiling stains.
Improving Ventilation
Making sure bathroom and kitchen exhaust fans vent outside rather than into the attic, and improving attic insulation and airflow, reduces the condensation that often causes slow-forming ceiling stains.
Periodic Ceiling Inspections
A quick visual check of ceilings every few months, especially after storms or seasonal temperature swings, makes it far easier to catch a new stain early, before it has time to spread or damage the drywall further.
When to Call a Professional?
Some situations go beyond a straightforward paint and primer job. Large stains that cover a significant portion of the ceiling, stains that keep reappearing after repair, or ceilings that sag or feel soft to the touch may point to structural damage that needs a contractor’s assessment. Likewise, mold that spreads beyond a small surface patch is best handled by a certified remediation specialist rather than a DIY bleach treatment.
Frequently Asked Questions
Can I paint over a water stain without primer? Regular paint alone will not stop a stain from bleeding through, since the water in the paint reactivates the tannins in the stain. A stain-blocking primer is essential for a lasting result.
How long should I wait after a leak before painting? It is best to wait until the area is completely dry, which can take anywhere from a few days to two weeks depending on humidity and airflow. A moisture meter can confirm the ceiling is ready.
Does a ceiling stain mean there is structural damage? Not always. Many stains are purely cosmetic once the leak is fixed. However, soft spots, sagging, or a stain that keeps growing are signs worth having a professional evaluate.
What is the best paint sheen for ceilings? Flat or matte finishes are the standard choice because they minimize glare and hide small surface imperfections better than glossier finishes.
How do I match ceiling paint color exactly? Bringing a paint chip or a small sample of the existing paint to a hardware store’s paint counter allows staff to color-match it closely using their scanning equipment.
Conclusion
Covering up a ceiling stain the right way takes a bit more effort than a quick coat of paint, but the payoff is a repair that actually lasts.
Identifying and fixing the water source, letting the area dry fully, cleaning and prepping the surface, and applying a proper stain-blocking primer before the topcoat are the steps that make the difference between a stain that vanishes for good and one that creeps back within days.
Following this process from start to finish is the most reliable way to paint over a water stain on ceiling drywall or plaster and end up with a ceiling that looks freshly finished, not patched.
Related Articles
How Much Is Epoxy Flooring? 2026 Cost Guide
Why Do Basement Windows Leak? Causes, Fixes & Prevention Guide
Can You Paint a Metal Roof? The Complete Answer Homeowners Need