


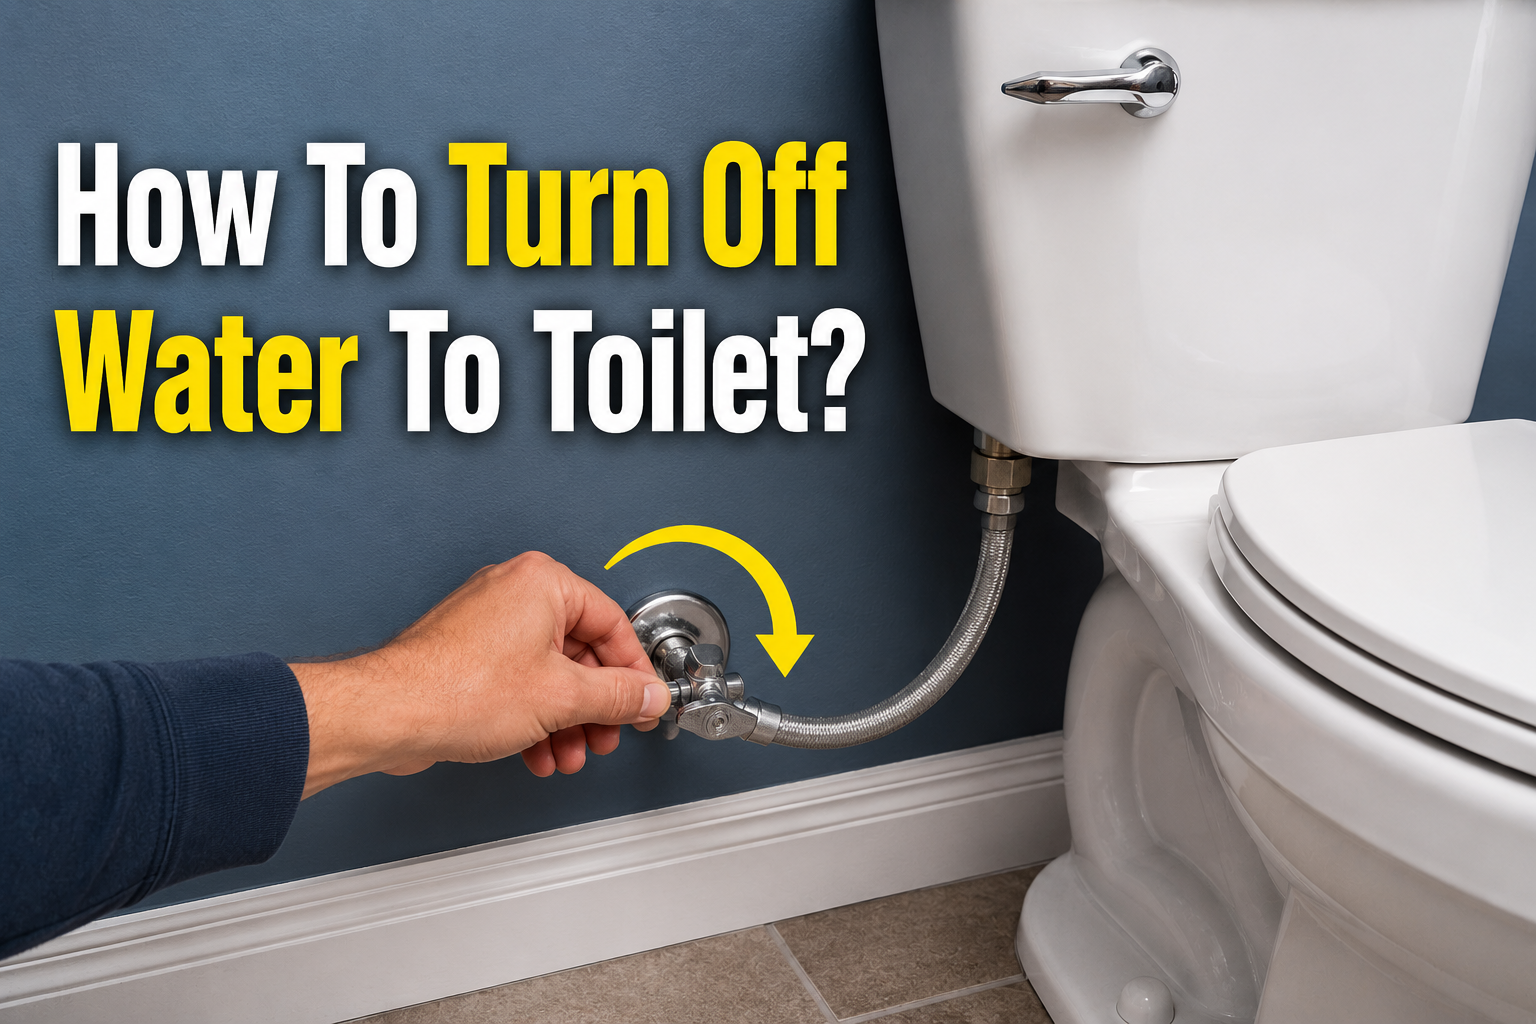
At some point, almost every homeowner or renter faces a moment when they need to know how to turn off water to toilet quickly and correctly. Maybe the tank is overflowing, maybe you are replacing a worn-out flapper, or maybe you are simply renovating your bathroom and need to disconnect the fixture temporarily. Whatever the reason, this is one of those small household skills that saves you from a much bigger headache later.
Many people assume that shutting off water to a toilet requires calling a plumber, but in reality, it is one of the simplest plumbing tasks you can learn. Once you understand where the valve is and how it works, the entire process takes less than a minute. The real challenge is knowing what to do if something goes wrong, such as a stuck valve or a missing shutoff altogether, and that is exactly what this guide will walk you through.
There are a few common situations where you will need this skill. A running toilet that will not stop filling, a cracked fill valve, an overflowing bowl, or a full bathroom remodel are the most frequent reasons people search for this information. In each case, cutting off the water supply immediately prevents water damage to your flooring, walls, and subfloor, which can otherwise turn into costly repairs.
Before you start, it helps to gather a small set of tools. You will rarely need anything complicated, but having the right items nearby makes the job faster and cleaner. Here is a simple list of what you should have on hand.
| Tool or Item | Purpose |
|---|---|
| Adjustable wrench or pliers | Helps turn a stiff or corroded valve |
| Old towel or rag | Wipes up small drips during the process |
| Bucket or shallow container | Catches leftover water from the tank or hose |
| Flashlight | Useful if the valve is behind the toilet in a dim area |
| Penetrating oil spray | Loosens a rusted or seized valve |
Safety is also worth a quick mention. Water shutoff valves are usually easy to handle, but if the valve is old, corroded, or unusually stiff, avoid using excessive force. Forcing a brittle valve can snap the stem or crack the pipe, turning a simple task into a much larger repair. Take your time, and if something feels wrong, stop and reassess before continuing.
Understanding Your Toilet’s Water Supply System
To confidently turn off the water, it helps to understand the basic system that delivers water to your toilet in the first place. Every toilet is connected to your home’s plumbing through a dedicated supply line, and that line almost always includes a small valve designed specifically for this fixture.
Anatomy of a Toilet Water Supply Line
The water supply line for a toilet typically runs from a pipe in the wall or floor, through a shutoff valve, and then up through a flexible or rigid hose into the bottom of the toilet tank. This entire path is usually visible if you look behind or beside the base of the toilet. The hose connects to a fill valve inside the tank, which regulates how much water enters after each flush.
What Is a Shutoff Valve?
A shutoff valve, sometimes called a stop valve or angle stop, is a small control point installed along the supply line. Its only job is to allow or block the flow of water to that specific fixture without affecting the rest of your home’s plumbing. This is incredibly useful because it means you do not need to shut off water to the entire house just to work on one toilet.
Types of Shutoff Valves
Not all shutoff valves look or operate the same way, and recognizing the type you have will make the process smoother.
| Valve Type | How It Works | Common Age or Style |
|---|---|---|
| Compression valve | Turns clockwise using a round or oval handle | Common in most modern homes |
| Ball valve | Uses a lever that turns a quarter turn to stop flow | Increasingly common in newer installations |
| Gate valve | Requires several full rotations to close completely | Found in older homes, prone to sticking |
| Multi-turn valve | Similar to compression, needs multiple turns | Common in mid-century homes |
Knowing which type you are dealing with helps you understand how many turns or how much movement is needed before the water is fully stopped.
Locating the Shutoff Valve
In most bathrooms, the valve sits low on the wall or floor, directly behind or beside the base of the toilet, connected to a short flexible hose leading up to the tank. It is usually chrome or plastic and small enough to turn with two fingers, though older ones may need a wrench.
What If There’s No Visible Shutoff Valve?
Some older homes, particularly those built before individual fixture valves became standard, may not have a dedicated shutoff for the toilet. If this is the case, do not worry. There are still ways to manage the situation, which are covered later in this guide when we discuss using the main water supply as a backup option.
Step-by-Step Guide to Turning Off Toilet Water
Once you understand the layout of your plumbing, actually performing the task is straightforward. Follow these steps in order for the smoothest experience.
Preparing the Area
Lay a towel on the floor beneath the valve area to catch any drips. Keep your bucket nearby in case you need to disconnect the hose later. If the area behind the toilet is dark or hard to see, use your flashlight to get a clear view of the valve before touching anything.
Locating and Accessing the Valve
Kneel or crouch beside the toilet and look for the small valve connected to the wall or floor pipe. Clear away any clutter, bath mats, or storage items that might be blocking access, since a clean, open space makes the next step much easier.
Turning the Valve Clockwise
This is the core action in the entire process of learning how to turn off water to toilet fixtures. Grip the valve handle firmly and turn it clockwise, following the old plumbing rule of “righty tighty, lefty loosey.” For a compression or multi-turn valve, keep turning until it stops moving and feels snug. For a ball valve with a lever handle, simply rotate the lever a quarter turn until it sits perpendicular to the pipe.
Confirming Water Is Fully Shut Off
After turning the valve, flush the toilet once. If the tank does not refill or only trickles slightly before stopping, the water has been successfully shut off. If the tank continues filling normally, the valve may not be fully closed, or it could be faulty, which is addressed in the troubleshooting chapter below.
Flushing the Tank to Drain Remaining Water
With the valve closed, flush the toilet one more time and hold the handle down briefly to drain as much water as possible from the tank. This step is especially important if you plan to remove the tank lid, replace internal parts, or disconnect the supply hose, since it minimizes spills and mess.
What to Do If the Shutoff Valve Doesn’t Work
Sometimes the valve does not cooperate, especially in older homes where fixtures have not been used or serviced in years. Here is how to handle the most common complications.
Signs of a Stuck or Broken Valve
A valve that will not turn, spins freely without stopping the water, or feels loose and wobbly is likely worn out or seized from mineral buildup and corrosion. These are common problems in homes with older plumbing or hard water deposits.
Using the Main Water Supply Shutoff
If the toilet’s individual valve is unresponsive, your next option is the main shutoff valve for your entire home. This is typically located in a basement, utility closet, crawl space, or near where the main water line enters the house. Turning this off will stop water throughout the home, so it is a temporary solution while you address the toilet-specific valve or arrange a repair.
Techniques for Loosening a Stuck Valve
A few drops of penetrating oil spray applied to the valve stem, left to sit for ten to fifteen minutes, can often loosen years of mineral buildup. Afterward, try turning the valve gently with an adjustable wrench, applying steady pressure rather than sudden force. Wrapping the wrench jaws with a cloth can also protect the valve’s finish.
When to Call a Plumber
If the valve remains frozen despite these efforts, or if you notice cracks, corrosion, or leaking around the valve body itself, it is time to bring in a licensed plumber. Attempting to force a damaged valve can lead to a burst pipe, which creates a far more serious and expensive problem than the original issue.
Turning the Water Back On
Once repairs or maintenance are complete, restoring water flow is just as simple as shutting it off, provided you follow a few careful steps.
Steps to Safely Reopen the Valve
Turn the valve counterclockwise slowly, following the “lefty loosey” principle. Avoid opening it too quickly, since a sudden rush of water can sometimes dislodge sediment inside old pipes and cause temporary cloudiness or minor sputtering from the fill valve.
Checking for Leaks After Reopening
After the valve is fully open, inspect the connection points at both the valve itself and where the hose meets the tank. Run your hand or a dry cloth around these areas to detect any dampness, which could indicate a loose connection that needs tightening.
Testing the Toilet Flush and Refill
Flush the toilet and observe the refill cycle from start to finish. The tank should fill steadily and stop once it reaches the designated water line, usually marked inside the tank. If the water keeps running past this point, the fill valve may need adjustment or replacement.
Common Mistakes to Avoid
Even a simple task like this comes with a few pitfalls that are easy to overlook. Being aware of them ahead of time can save you frustration.
Overtightening the valve is one of the most frequent mistakes people make, especially when they are unsure whether the water has fully stopped. Cranking the handle with excessive force will not close it any faster and can damage the internal washer or stem over time. Turn firmly but stop as soon as resistance is felt.
Forgetting to drain the tank before disconnecting the hose is another common oversight. Even after the valve is closed, there is usually still a tank full of water waiting to spill out if you remove the lid or detach the supply line without flushing first.
Ignoring small leaks after shutting off or restoring the water is a mistake that often leads to bigger problems down the road. A tiny drip at the valve connection may seem harmless at first, but over weeks or months it can cause water damage to flooring or cabinetry.
Using excessive force on old, brittle valves is particularly risky. Many valves that have not been touched in a decade or more become fragile, and aggressive turning can snap the handle or crack the valve body entirely, sometimes resulting in an uncontrolled water leak.
Maintenance Tips
Keeping your toilet’s shutoff valve in good working condition means you will never struggle when you actually need to use it.
It is worth testing your shutoff valve every few months, simply turning it closed and open again to make sure it moves freely. This small habit prevents the mineral buildup and stiffness that come from years of inactivity.
Preventing corrosion is easier than fixing it later. Wiping down the valve occasionally and keeping the area dry helps reduce the mineral deposits and rust that commonly form in humid bathroom environments.
If your valve is several decades old, shows visible rust, or has needed repeated force to operate, it may be time to replace it with a modern quarter-turn ball valve. These newer valves are far more reliable and rarely seize up the way older compression valves do.
Frequently Asked Questions
Can I shut off water without the valve? If there is truly no valve present, your only alternative is the main water shutoff for the home, which stops water to every fixture rather than just the toilet.
Is it safe to leave the valve off long-term? Yes, it is generally safe to leave a toilet’s shutoff valve closed for extended periods, such as during a renovation or if the toilet is not in use, as long as the valve itself is in good condition.
Why won’t water stop even after shutoff? This usually points to a worn-out valve washer or a valve that has not fully closed. In some cases, sediment lodged inside the valve prevents a complete seal, which may require cleaning or replacement.
Conclusion
Learning how to turn off water to toilet fixtures is a small but genuinely valuable skill for any homeowner. It takes only a few minutes to locate the valve, turn it clockwise, and confirm the water has stopped, yet this simple action can prevent significant water damage during emergencies or routine repairs. By understanding your valve type, knowing what to do if it sticks, and following good maintenance habits, you will always be prepared the next time your toilet needs attention.
Keep this guide handy, and remember that a little preparation now can spare you from a much larger and more expensive plumbing problem later.
Related Articles
How to Unclog a Kitchen Sink: 8 Easy DIY Methods That Actually Work
How to Fix a Leaking Kitchen Sink: Step-by-Step Guide
How to Clean Bathroom Mats: A Complete Step-by-Step Guide
How to Get Super Glue Off a Wood Floor? Without Ruining the Finish