


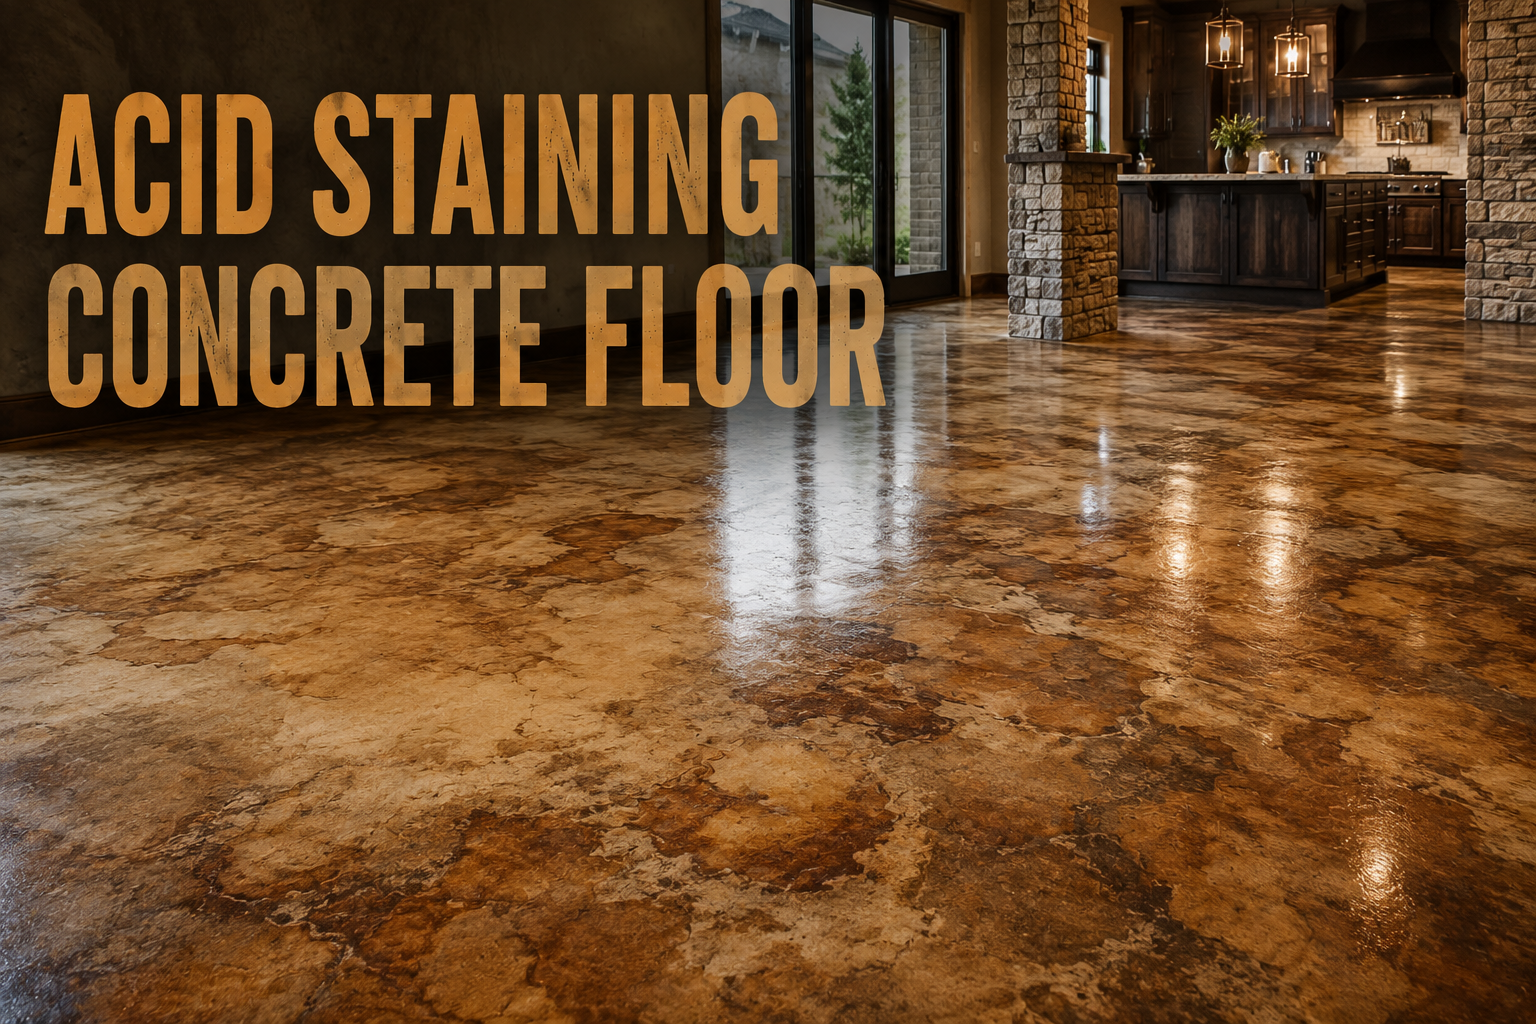
If you’ve ever walked into a home or restaurant and noticed a floor with rich, marbled colors that almost look like natural stone, there’s a good chance you were standing on an acid-stained concrete floor. Acid staining concrete floor surfaces has become one of the most popular ways to transform plain, gray concrete into something that looks custom, warm, and one-of-a-kind. Unlike paint, which simply covers the surface, acid staining works by reacting chemically with the concrete itself, so the color becomes part of the floor rather than a layer sitting on top of it.
This guide walks you through everything you need to know about acid staining concrete floor projects, from the science behind how the stain works to the exact steps involved in applying it, along with costs, safety precautions, and long-term care tips.
What Is Acid Staining?
Acid staining is a decorative concrete finishing technique that uses a mixture of water, hydrochloric (muriatic) acid, and metallic salts. When this solution is applied to concrete, the acid opens up the surface pores while the metallic salts react with the calcium hydroxide naturally present in cured concrete. This chemical reaction produces variegated, translucent color tones that can range from soft earthy browns to deep blues and greens, depending on the specific salts used.
Why Homeowners Choose Acid-Stained Concrete
People choose acid staining because it delivers a look that simply can’t be replicated with paint or standard coatings. Every acid-stained floor turns out slightly different, with natural mottling, subtle color variation, and a depth that mimics polished stone, leather, or marble. It’s also a practical option because it works directly on existing concrete slabs, meaning homeowners don’t need to install a brand-new floor covering.
Quick Overview of the Process
At a high level, the process for acid staining concrete floor surfaces involves cleaning the slab, applying the acid stain, letting it react, neutralizing the acid, rinsing the floor, and finally sealing it to protect the finish. Each of these stages plays an important role in how the final color turns out, which is why proper preparation and technique matter so much.
What Is Concrete Acid Staining? (In-Depth)
The Science Behind Acid Staining (Chemical Reaction Explained)
Concrete is naturally alkaline and contains calcium hydroxide, a byproduct of the cement curing process. Acid stains contain metallic salts, such as iron, copper, or cobalt compounds, dissolved in a mildly acidic solution. When the stain is applied, the acid etches the surface just enough to allow the metallic salts to penetrate and bond with the calcium hydroxide. This reaction creates insoluble color compounds that become permanently locked into the concrete’s surface layer.
Because this is a chemical reaction rather than a coating process, the resulting color is not uniform. Variations in the concrete’s density, curing conditions, and mineral composition all influence how the stain reacts, which is exactly what gives acid-stained floors their signature marbled, variegated appearance.
How It Differs from Concrete Dye, Paint, and Stamped Concrete
Many people confuse acid staining with other decorative concrete methods, so it helps to understand the differences clearly.
| Method | How It Works | Appearance | Durability |
|---|---|---|---|
| Acid Staining | Chemical reaction with concrete | Translucent, mottled, natural stone-like | Very durable, won’t peel or chip |
| Concrete Dye | Pigment absorbed into surface | Vivid, uniform, wide color range | Can fade with UV exposure |
| Paint/Coating | Sits on top of the surface | Opaque, solid color | Prone to chipping and peeling |
| Stamped Concrete | Textured pattern pressed into wet concrete | Mimics brick, stone, or tile texture | Durable but texture-dependent |
Why No Two Floors Look Alike
Because acid staining depends on the concrete’s own chemical makeup, no two floors will ever react exactly the same way, even if the same stain and application method are used. This unpredictability is often seen as a feature rather than a flaw, since it means every acid-stained concrete floor has a genuinely unique, artisan-like finish.
Types of Concrete Stains
Acid-Based (Reactive) Stains
Acid-based stains are the traditional option and the type most people mean when they talk about acid staining concrete floor projects. They produce the deepest, most natural-looking variegation because of the chemical reaction described earlier. However, they come in a more limited color palette, generally centered around earth tones, along with some blues and greens.
Water-Based Stains
Water-based stains are a newer alternative that use pigments suspended in an acrylic or water-based carrier instead of a chemical reaction. They offer a much broader color range, including brighter and more vivid tones, and they’re generally considered safer and easier to apply since there’s no acid to neutralize.
Acid Stain vs. Water-Based Stain: Pros and Cons
Choosing between the two often comes down to what look you’re going for and how comfortable you are working with acid.
| Factor | Acid Stain | Water-Based Stain |
|---|---|---|
| Color Range | Limited, earthy tones | Wide range, including bold colors |
| Look | Natural, variegated, translucent | More uniform, can still have variation |
| Safety | Requires careful handling | Generally safer and easier to apply |
| Predictability | Less predictable results | More predictable outcomes |
| Best For | Rustic, natural stone look | Custom colors, modern designs |
Benefits of Acid-Stained Concrete Floors
Durability and Longevity
Because the color becomes chemically bonded to the concrete rather than sitting on the surface, acid-stained floors are extremely resistant to peeling, chipping, or fading from foot traffic. With a proper sealer and reasonable care, an acid-stained concrete floor can last for decades.
Low Maintenance
Once sealed, these floors typically only require regular sweeping and occasional damp mopping. There’s no carpet to shampoo, no grout lines to scrub, and no wood finish to worry about scratching.
Unique, Natural, Marbled Aesthetic
The organic, stone-like variegation is one of the biggest draws. It gives spaces a warm, custom, high-end look that’s difficult to achieve with manufactured flooring materials.
Cost-Effectiveness vs. Other Flooring
Since acid staining works on existing concrete slabs, it eliminates the material and labor costs associated with installing new flooring like tile, hardwood, or stone. This makes it one of the more budget-friendly ways to upgrade a floor’s appearance.
Eco-Friendliness
Acid staining doesn’t require tearing out and disposing of old flooring materials, and it works with the concrete that’s already there, which reduces construction waste compared to a full flooring replacement.
Drawbacks and Limitations
Unpredictable Color Outcomes
The same unpredictability that gives acid-stained floors their charm can also be a downside for people who want precise, controlled color results. It’s difficult to guarantee an exact shade ahead of time.
Not Ideal for All Concrete Surfaces
Very smooth, dense, or heavily sealed concrete may not absorb the stain well, leading to a weak or blotchy reaction. Concrete with excessive cracking or previous coatings can also pose challenges.
Odor and Ventilation Concerns
Because the process involves muriatic acid, it produces strong fumes during application and neutralization. Good ventilation is essential, especially for indoor projects.
Requires Skilled Application
Achieving an even, attractive finish takes practice. Inexperienced application can lead to streaking, pooling, or uneven color distribution, which is one reason many homeowners choose to hire a professional.
Color Options and Design Possibilities
Popular Acid Stain Colors
Traditional acid stains are known for their earthy, natural palette, which typically includes:
- Warm browns and tans
- Terracotta and rust tones
- Amber and honey shades
- Deep blues
- Soft greens
Layering Colors for Custom Effects
Applying multiple stain colors in layers, or blending two stains during application, can create richer, more complex color effects that mimic natural stone even more closely.
Combining with Stencils, Scoring, or Engraving
For a more decorative look, some homeowners combine acid staining with concrete scoring (cutting shallow lines into the surface to mimic tile or stone patterns) or stencils to create borders, medallions, or geometric designs.
Indoor vs. Outdoor Color Considerations
Lighter, warmer tones tend to work well for interior spaces since they reflect light and create a cozy atmosphere, while darker, richer tones are often chosen for patios and driveways where they hide dirt and wear better over time.
Where Acid Staining Works Best
Indoor Applications
Acid staining concrete floor techniques are commonly used in living rooms, basements, and garages that have been converted into living spaces. It’s especially popular in homes with a modern, industrial, or rustic design aesthetic.
Outdoor Applications
Patios, driveways, and pool decks are excellent candidates for acid staining since the finish holds up well to weather exposure when properly sealed, and it adds visual interest to otherwise plain concrete slabs.
Commercial Uses
Restaurants, retail stores, and offices often use acid-stained concrete because it’s durable enough to handle heavy foot traffic while still offering a polished, upscale appearance without the ongoing maintenance costs of other flooring types.
Pre-Application: Surface Preparation
Assessing Concrete Age and Condition
New concrete typically needs to cure for at least 28 days before staining, since the calcium hydroxide reaction that acid stains rely on needs time to fully develop. Older concrete should be checked for previous sealers or coatings that could block the stain from penetrating.
Cleaning and Degreasing the Surface
Any dirt, dust, oil, or grease must be thoroughly removed before staining. Even small amounts of residue can prevent the stain from reacting evenly, leading to visible blotches or bare spots.
Repairing Cracks and Imperfections
Cracks, chips, or uneven patches should be repaired ahead of time, since the acid stain will highlight rather than hide these imperfections.
Testing the Stain on a Small Area
Because results vary so much from slab to slab, it’s strongly recommended to test the stain on a small, inconspicuous area first. This gives a realistic preview of how the color will actually turn out on that specific concrete.
Step-by-Step Acid Staining Process
Tools and Materials Needed
- Acid stain solution
- Concrete cleaner/degreaser
- Neutralizing agent (baking soda and water solution)
- Plastic sprayer or applicator
- Soft-bristle scrub brush
- Wet/dry vacuum or mop
- Rubber gloves, goggles, and respirator
- Concrete sealer
- Optional: wax or finish coat
Step 1: Clean the Concrete
Sweep and scrub the entire surface, removing all dust, oil, and debris, then let it dry completely before moving forward.
Step 2: Apply the Acid Stain
Using a plastic sprayer (never metal, since it can react with the acid), apply the stain evenly in a circular or sweeping motion to avoid visible lines or streaks.
Step 3: Allow Reaction Time
Let the stain sit and react with the concrete, typically anywhere from a few hours to overnight, depending on the product and desired intensity.
Step 4: Neutralize the Acid
Apply a neutralizing solution, usually a mixture of water and baking soda, to stop the chemical reaction and bring the surface back to a neutral pH.
Step 5: Rinse and Dry
Thoroughly rinse the floor with clean water and allow it to dry completely, which can take a full day or more depending on humidity and airflow.
Step 6: Apply Sealer
Once dry, apply a concrete sealer to protect the color and add sheen. This step is essential, since an unsealed acid-stained floor is vulnerable to staining and wear.
Step 7: Add Wax or Finish Coat (Optional)
A final wax layer can add extra shine and an additional layer of protection, though it will need periodic reapplication.
Safety Precautions
Protective Gear
Because muriatic acid is corrosive, proper protective equipment is non-negotiable. This includes rubber gloves, chemical-resistant goggles, and a respirator rated for acid fumes.
Ventilation Requirements
Fumes from acid staining can be harmful if inhaled in an enclosed space. Windows and doors should be opened, and fans used to keep air circulating throughout the entire process.
Handling and Disposing of Acid Safely
Leftover acid and rinse water should never be poured down a regular drain. Local regulations typically require neutralizing any acid waste before disposal, and it’s worth checking municipal guidelines beforehand.
Working Around Pets, Kids, and Plants
Pets and children should be kept away from the work area until the floor has been fully neutralized and rinsed. Nearby plants and landscaping should also be protected from acid runoff, which can damage soil and vegetation.
DIY vs. Hiring a Professional
Cost Comparison
DIY acid staining is significantly cheaper upfront since you’re only paying for materials, while hiring a professional adds labor costs but reduces the risk of a botched job that requires expensive fixes.
Skill Level Required
Getting an even, attractive finish takes practice with application technique, timing, and reading how the concrete is reacting in real time, which can be difficult to master on a first attempt.
Common DIY Mistakes to Avoid
- Applying stain unevenly, leading to streaks
- Skipping the test patch step
- Not neutralizing the acid thoroughly
- Forgetting to seal the floor promptly
- Using metal equipment that reacts with the acid
When to Call a Professional Contractor
Large floor areas, complex color designs, or situations involving previously coated concrete are often better left to professionals who have the experience to predict and control how the stain will react.
Cost Breakdown
Average Cost Per Square Foot
Acid staining concrete floor projects typically range from about $2 to $4 per square foot for basic DIY jobs using materials alone, while professionally installed projects with sealing and design work can run anywhere from $7 to $15 per square foot or more, depending on complexity.
Factors That Affect Pricing
| Factor | Impact on Cost |
|---|---|
| Floor size | Larger areas generally cost less per square foot |
| Surface condition | Repairs and prep increase overall cost |
| Design complexity | Multiple colors, scoring, or patterns raise price |
| DIY vs. professional | Labor significantly increases total cost |
| Sealer/finish type | High-end sealers and waxes add to the budget |
DIY Material Costs vs. Professional Labor Costs
Materials for a DIY project usually include the stain, neutralizer, sealer, and protective gear, which together might cost a few hundred dollars for an average-sized room. Professional labor costs cover surface prep, skilled application, and cleanup, which is where most of the added expense comes from.
Maintenance and Care
Daily Cleaning Tips
Regular sweeping and occasional damp mopping with a pH-neutral cleaner is usually all that’s needed to keep an acid-stained floor looking its best.
Resealing Frequency
Depending on foot traffic and the type of sealer used, most acid-stained floors benefit from resealing every one to three years to maintain protection and shine.
Protecting Against Scratches and Wear
Using furniture pads, doormats at entryways, and avoiding dragging heavy or sharp objects across the floor will help preserve the sealer and underlying finish.
Fixing Faded or Damaged Areas
Minor wear can often be addressed by cleaning and reapplying sealer, while deeper damage or fading may require a professional to touch up or reapply stain in the affected area.
Common Problems and Troubleshooting
Uneven Color or Blotching
This is usually caused by inconsistent surface porosity, leftover residue, or uneven application, and it’s one of the most common issues in DIY projects.
Stain Not Reacting Properly
If the concrete has been previously sealed or is unusually dense, the acid may not penetrate well enough to react, resulting in a weak or patchy color.
Peeling Sealer
Sealer applied over a damp surface or in unfavorable weather conditions can fail prematurely, leading to peeling or cloudiness over time.
Efflorescence (White Residue) Issues
Efflorescence, a white, powdery mineral deposit, can form if moisture moves through the concrete from underneath, which is more of an underlying moisture issue than a staining problem itself.
Acid Staining vs. Other Flooring Options
Acid Stain vs. Epoxy Flooring
Epoxy offers a glossy, uniform finish and comes in a much wider range of colors and patterns, but it sits on top of the concrete and can eventually chip or peel, unlike the chemically bonded finish of acid staining.
Acid Stain vs. Tile
Tile offers more design flexibility and a wider range of textures, but it requires grout maintenance and can crack, whereas acid-stained concrete is a single continuous surface with no seams.
Acid Stain vs. Polished Concrete
Polished concrete focuses on a smooth, reflective finish through mechanical grinding, and it’s often combined with staining, since polishing alone doesn’t add color the way acid staining does.
Frequently Asked Questions (FAQ)
How Long Does Acid Staining Last? With proper sealing and maintenance, an acid-stained concrete floor can last 10 to 20 years or longer, since the color is chemically bonded rather than sitting on the surface.
Can You Acid Stain Over Existing Paint or Sealer? No. Acid stain needs direct contact with bare concrete to react, so any existing paint, epoxy, or sealer must be fully removed first.
Is Acid Staining Safe for Indoor Use? Yes, as long as the space is well-ventilated during application and the acid is properly neutralized and rinsed afterward.
Can You Change the Color Later? Once applied, the original acid-stained color can’t be fully removed, though a new color can sometimes be layered on top to alter the overall appearance.
How Long Does the Process Take? A typical acid staining concrete floor project takes anywhere from two to five days, factoring in cleaning, staining, neutralizing, drying, and sealing.
Conclusion
Recap of Key Benefits
Acid staining concrete floor surfaces offers a durable, low-maintenance, and visually striking alternative to traditional flooring, with a natural, marbled look that only comes from a genuine chemical reaction with the concrete itself.
Is Acid Staining Right for Your Space?
It’s an excellent choice for anyone who values a unique, organic aesthetic and doesn’t mind a bit of unpredictability in the final color outcome. Spaces with existing concrete slabs, whether indoors or outdoors, are ideal candidates.
Final Tips Before You Start
Always test the stain on a small area first, prioritize proper ventilation and safety gear, and don’t skip the sealing step, since it’s what protects your investment and keeps the color looking vibrant for years to come.
Related Articles
How To Remove Texture From Walls: The Complete Step-by-Step Guide
Crown Moulding with Drop Ceiling: The Complete Installation Guide
How To Get Blu Tack Stains Off Walls: A Complete Step-By-Step Guide