



Introduction
Buying new drapes can completely change the look and feel of a room, but even the most beautiful fabric will look wrong if it does not fit the window properly. That is why so many homeowners search for how do you measure drapes for windows before they order a single panel.
Getting the measurements right the first time saves money, saves time, and saves the frustration of returning drapes that pool awkwardly on the floor or stop several inches short of where they should. This guide walks through every part of the process in plain, easy language, from the tools you need to the small details that most people forget.
Why Accurate Measurements Matter?
Drapes are one of the few home decor items where a small measuring error becomes very obvious very quickly. A window treatment that is too narrow will not cover the glass properly and will let light leak in around the edges.
A drape that is too short will look accidental rather than intentional, while one that is too long may drag on the floor and gather dust.
Learning how do you measure drapes for windows correctly is the foundation of a finished, professional-looking room, whether you are dressing a single kitchen window or an entire wall of glass doors.
Common Mistakes When Measuring Drapes
Most measuring mistakes come down to rushing the process or skipping a step. People often measure only the glass instead of the full frame, forget to plan for fullness in the fabric, or fail to decide on rod height before they start measuring length.
Others use a cloth tape measure that stretches slightly, which throws off the final numbers. Being aware of these pitfalls ahead of time makes it much easier to avoid them.
What You’ll Need Before You Start?
Before diving into numbers, it helps to gather a few basic supplies and make a few decisions about style. Once you know the rod type, mounting style, and desired drape length, the actual measuring becomes a quick and simple task.
Tools Required for Measuring
Having the right tools on hand makes the entire process faster and far more accurate.
| Tool | Purpose |
|---|---|
| Metal tape measure | Provides rigid, accurate readings without stretching |
| Step stool or small ladder | Allows safe access to rod height near the ceiling |
| Pencil and notepad, or a measuring app | Records numbers immediately so nothing is forgotten |
| Level | Confirms the rod bracket will hang straight |
Metal Tape Measure vs. Fabric Tape Measure
A metal tape measure is strongly recommended over a fabric or cloth one. Fabric tapes can stretch slightly over time or sag when measuring vertical distances, which introduces small errors that add up. A retractable metal tape measure stays rigid, making it far easier to get a straight, dependable reading from the floor to the ceiling.
Step Stool or Ladder
Many windows, especially those with rods mounted close to the ceiling, are difficult to measure without some extra height. A sturdy step stool keeps the process safe and lets you get an accurate reading at the top of the window rather than guessing.
Pencil, Notepad, or Measurement App
It is easy to forget a number between the window and the notepad, especially if you are measuring several rooms at once. Writing measurements down immediately, or entering them into a notes app on your phone, prevents mix-ups later when you are ready to order.
Level (for Checking Rod Alignment)
If the rod has not been installed yet, a small level helps confirm that the brackets are even on both sides. An uneven rod will make even perfectly measured drapes look crooked once they are hung.
Understanding Window and Rod Basics
Before picking up the tape measure, it helps to understand a few basics about rods and mounting styles, since these decisions directly affect your final numbers.
Types of Curtain Rods
Curtain rods generally fall into a few categories: standard rods that hold rings or rod-pocket panels, traverse rods that open and close with a cord or wand, and decorative rods with finials that add a design element on either end. The type of rod you choose can slightly change how much extra width you need to add for stacking fabric to the sides.
Inside Mount vs. Outside Mount
An inside mount fits the rod or track within the window frame itself, giving a clean, built-in appearance. An outside mount places the rod on the wall above and beyond the frame, which allows the drape to fully block light and makes the window appear larger. Most decorative drape panels use an outside mount, and this guide focuses primarily on that style.
Choosing Rod Placement Height
For an outside mount, the rod is typically placed four to six inches above the top of the window frame. If you want to create the illusion of a taller window and higher ceiling, you can mount the rod closer to the ceiling, sometimes six to twelve inches above the frame. This decision should be made before measuring length, since it changes where the top of the drape will actually sit.
Measuring Width
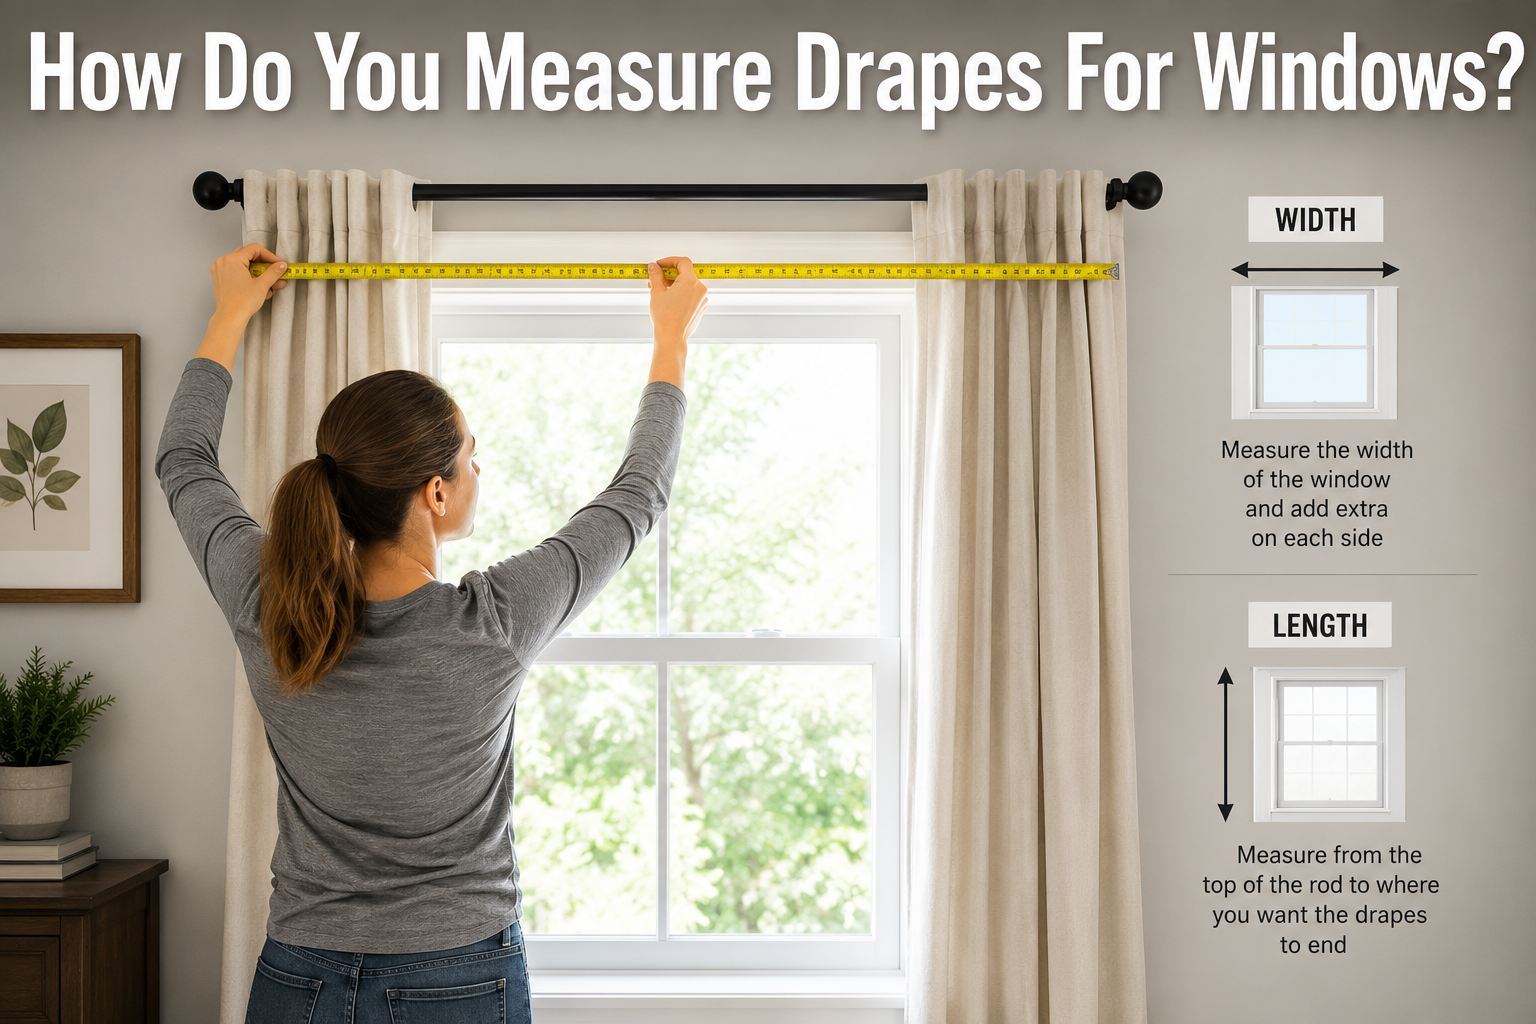
Width is usually the first measurement people take, and it is where the concept of “fullness” becomes important.
Measuring the Window Frame
Start by measuring the width of the window frame itself, from outer edge to outer edge. This number gives you a baseline, even though the final rod width will typically extend beyond it on both sides.
Measuring an Existing Rod
If a rod is already installed, measure it from end to end, not including any decorative finials. This is the number you will use as the base width for calculating how much fabric is needed.
Calculating Fullness
This is one of the most important parts of learning how do you measure drapes for windows, because flat, un-fulled fabric rarely looks good once hung. To calculate fullness, multiply the rod width by 1.5 to 2 times for a soft, gathered look, or up to 2.5 to 3 times for very sheer or lightweight fabrics that need more volume to look substantial. For example, a 60-inch rod would need roughly 90 to 120 inches of total fabric width across both panels combined.
Adjusting Width for Different Fabric Weights
Heavier fabrics such as velvet or lined cotton generally look full even at the lower end of the multiplier, around 1.5 to 2 times the rod width. Sheer or lightweight fabrics tend to look flat and skimpy unless you use a higher multiplier, closer to 2.5 or even 3 times the rod width, so keep the fabric type in mind while doing this calculation.
Measuring Length
Length is where personal style comes into play the most, since there are several standard lengths to choose from.
Determining Rod Height Placement
Length measurements always start from the rod or the rings the drapes will hang from, not from the top of the window frame. This is why deciding on rod placement, as covered in section 3.3, needs to happen first.
Sill-Length Drapes
Sill-length drapes end right at, or just barely above, the windowsill. This style works well in kitchens, bathrooms, or anywhere a radiator or furniture sits directly beneath the window.
Apron-Length Drapes
Apron-length drapes extend a few inches past the sill, generally four to six inches, covering the trim piece below the window known as the apron. This is a versatile, casual option that suits many rooms.
Floor-Length Drapes
Floor-length drapes are the most popular choice for living rooms and bedrooms. They should end about half an inch above the floor, which allows the fabric to hang cleanly without dragging or bunching.
Puddle-Length Drapes
Puddle-length drapes include one to three extra inches of fabric that pool softly on the floor, creating a formal, luxurious look. This style requires more fabric and is best suited to rooms with low foot traffic, since the pooled fabric can gather dust over time.
Measuring for Different Room Types
Different rooms often call for different lengths. The table below offers a quick reference.
| Room | Suggested Length Style |
|---|---|
| Kitchen | Sill length or apron length |
| Bathroom | Sill length |
| Bedroom | Floor length |
| Living room | Floor length or puddle length |
| Formal dining room | Puddle length |
Special Considerations
Not every window is a simple rectangle, so a few special situations deserve extra attention.
Measuring for Bay Windows
Bay windows have angled sections, so each segment should be measured individually rather than treating the whole bay as one continuous width. A curved or angled rod is usually needed, and the manufacturer’s instructions for that specific rod should guide the width calculations for each panel.
Measuring for French Doors or Sliding Doors
For doors, it is important to measure the full height from the top of the frame to the floor, since the drape often needs to clear the door as it swings or slides open. Width should extend well past the door frame on the side that does not open, so the panel can be pulled fully out of the way without blocking access.
Measuring for High or Vaulted Ceilings
In rooms with very tall ceilings, mounting the rod higher than the standard four to six inches above the frame can help the window feel more proportional to the room. In these cases, always measure the actual planned rod height rather than assuming a standard drop.
Measuring for Layered Drapes
When combining a sheer panel with a heavier blackout or lined panel, you will typically need two separate rods mounted at slightly different depths from the wall. Measure each rod and its corresponding fabric width and length separately, since sheer layers often use a higher fullness multiplier than the outer layer.
Header Styles and Their Effect on Measurements
The way the top of the drape attaches to the rod, known as the header, can change how much extra length you need to purchase.
Rod Pocket
A rod pocket is a sewn channel at the top of the panel that the rod slides through directly. This style typically uses about half an inch to an inch of fabric above the rod, which slightly raises the visible top edge, so this small amount should be factored into the length.
Grommet Top
Grommet panels have metal rings sewn into the top of the fabric that the rod passes through. This style creates soft, even folds and generally sits close to the top of the rod, requiring less adjustment to your length calculation.
Tab Top
Tab-top drapes use fabric loops sewn along the top edge. Because the tabs add a small amount of height above the rod, this should be accounted for in the same way as a rod pocket.
Pinch Pleat
Pinch-pleat drapes use hooks that attach below the top edge of the fabric, so the panel typically hangs from just under the rod rather than around it, which can slightly change the drop measurement compared to rod-pocket styles.
Ring Top
Ring-top or clip-ring styles attach with separate rings that clip onto the fabric and slide along the rod. Because the rings add a small amount of distance between the rod and the top of the fabric, this style often hangs slightly lower than the rod itself, which is worth testing before finalizing your length.
Double-Checking Your Measurements
Measuring Twice, Cutting Once
The old carpentry saying applies just as well to window treatments. Taking each measurement a second time, ideally on a different day or with a different tape measure, helps catch small errors before they become expensive mistakes.
Accounting for Uneven Walls or Floors
Older homes in particular often have walls and floors that are not perfectly level. Measuring in at least two or three spots across the width of the window, rather than assuming one measurement applies evenly, helps you catch these small variations.
Creating a Measurement Chart for Multiple Windows
If you are measuring several windows at once, a simple chart can keep everything organized and prevent confusion when it is time to order.
| Window/Room | Rod Width | Fullness Multiplier | Total Fabric Width | Rod-to-Floor Length |
|---|---|---|---|---|
| Living room | ||||
| Bedroom 1 | ||||
| Bedroom 2 | ||||
| Kitchen |
Common Measuring Mistakes to Avoid
Even careful shoppers can slip up in a few predictable ways.
Forgetting the Fullness Ratio
Ordering fabric that matches the rod width exactly, without multiplying for fullness, is one of the most frequent errors. This results in flat, skimpy-looking panels that do not close properly.
Ignoring Rod Overhang
Rods are usually mounted several inches beyond each side of the window frame, so measuring only the frame itself and forgetting the overhang will leave the fabric width too short once the rod is actually installed.
Not Accounting for Header Shrinkage
As covered in section seven, different header styles add or subtract a small amount from the visible length. Skipping this detail can leave drapes hovering an inch or two off the floor when floor length was intended.
Quick Reference: Measurement Cheat Sheet
For a fast recap, the table below summarizes the core formulas covered throughout this guide.
| Measurement | Formula or Guideline |
|---|---|
| Rod width | Frame width plus extension on each side |
| Fabric width (fullness) | Rod width multiplied by 1.5 to 3, depending on fabric weight |
| Rod placement height | 4 to 6 inches above frame, or higher for tall ceilings |
| Sill length | Rod to windowsill |
| Apron length | Rod to 4–6 inches below sill |
| Floor length | Rod to half an inch above floor |
| Puddle length | Rod to floor, plus 1–3 extra inches |
Anyone who wants a simple answer to how do you measure drapes for windows can return to this table as a quick refresher once the fuller explanations above have been read.
Conclusion
Measuring drapes does not need to be complicated once you understand the basic building blocks: rod width, fullness, rod height, and your preferred length style. Taking a few extra minutes to double-check numbers, account for header style, and note any irregularities in the wall or floor makes a noticeable difference in how finished the final room looks.
With these steps, you now have a clear, reliable answer to how do you measure drapes for windows for any room in your home. Still, for unusual window shapes, motorized tracks, or large installations spanning multiple windows, it is worth consulting a professional installer. They can confirm measurements, recommend the right hardware, and ensure everything is mounted level and secure. That extra check gives you full confidence that your new drapes will fit and function exactly as intended.
Related Articles
How To Restain Kitchen Cabinets? Step-By-Step Guide For Beginners
Are Toilet Seats Universal? Complete Sizing, Fitting & Buying Guide
Why Are Your Hardwood Floors Suddenly Slippery?