



Introduction
If you have ever looked closely at the edge of a roof, you may have noticed a thin strip of metal running along the border where the shingles meet the fascia. Most homeowners walk past this small detail every day without giving it a second thought. Yet this simple piece of material plays a surprisingly big role in keeping a home safe from water damage. So, what is a drip edge on a roof, and why do roofing professionals insist that no roof should ever go without one?
In this guide, we will break down everything you need to know about drip edges in plain, easy-to-understand language. By the end, you will know exactly what a drip edge is, why it matters, the different types available, how much it costs, and how to keep it in good shape for years to come.
What Is a Drip Edge? (Core Definition)
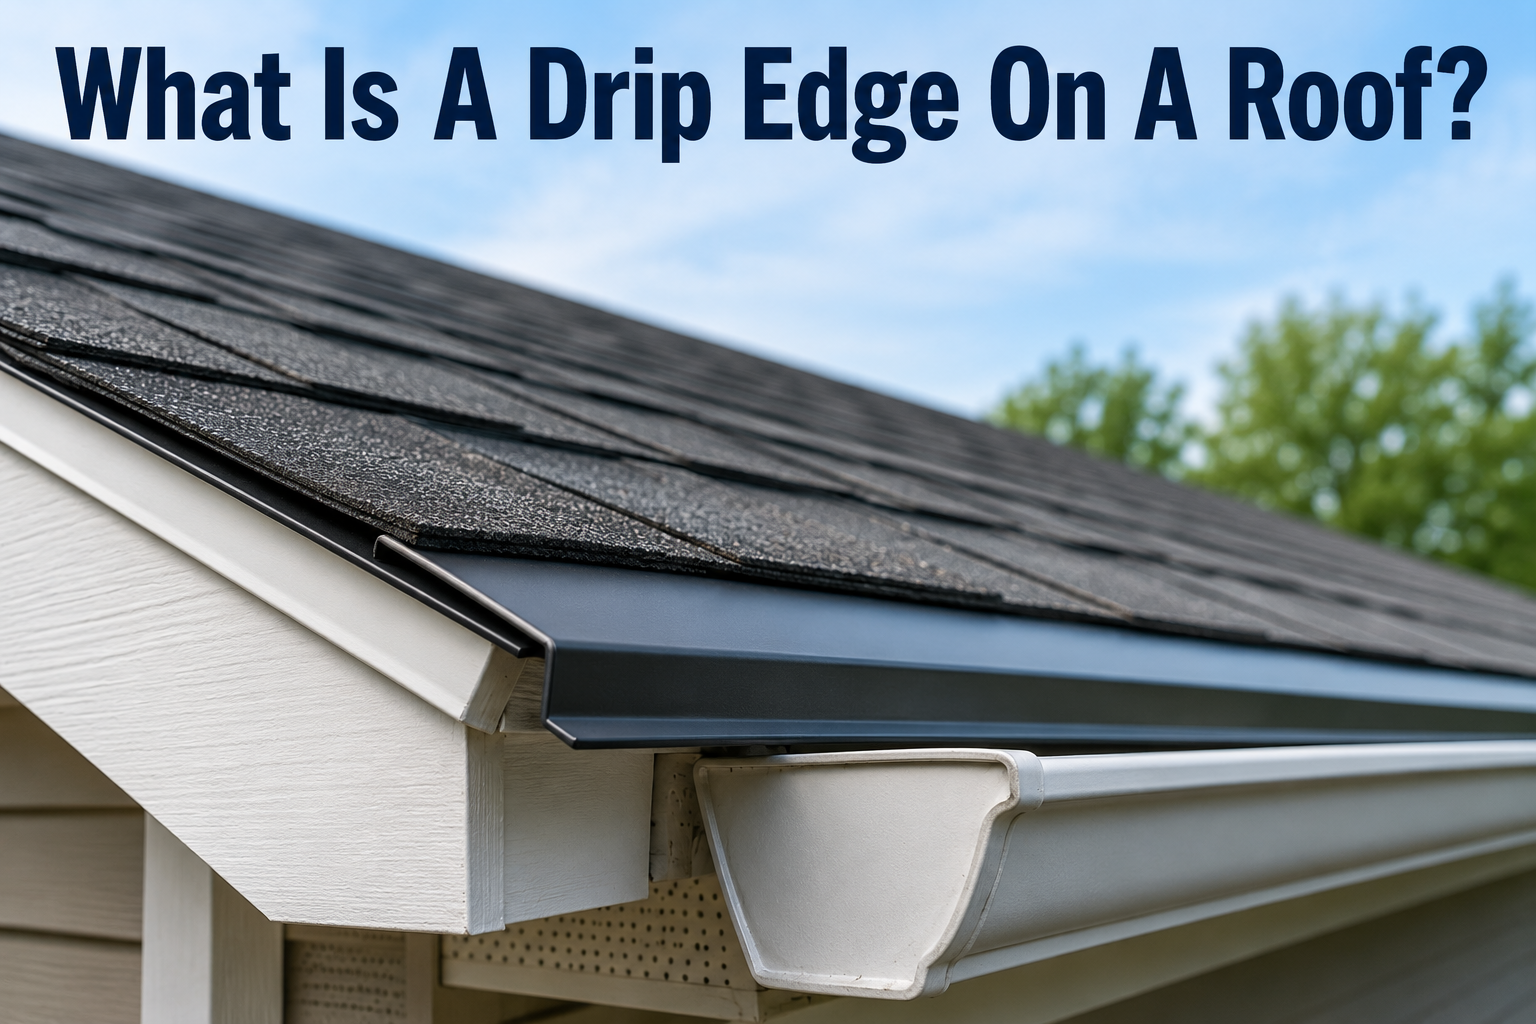
A drip edge is a narrow strip of metal flashing installed along the outer edges of a roof, typically at the eaves (the horizontal bottom edges) and the rakes (the sloped edges along the sides of the roof). Its main job is to guide rainwater away from the fascia board and directly into the gutter system instead of allowing it to drip down the side of the house or seep underneath the roofing materials.
Think of a drip edge as a small guardrail for water. Without it, rain running off the shingles would cling to the underside of the roof edge due to surface tension, eventually finding its way into the wood beneath. The drip edge breaks this surface tension and forces water to fall cleanly away from the structure.
Drip edges are usually installed during the roofing process, tucked beneath the shingles at the rakes and either above or below the underlayment at the eaves, depending on local building codes and roofing standards.
Why Is a Drip Edge Important?
Many people assume shingles alone are enough to protect a roof, but the edges of a roof are actually some of the most vulnerable areas. Here is why a drip edge matters so much.
A drip edge prevents water from damaging the fascia and soffit, which are the wooden or composite boards that sit at the roofline. Without this protection, moisture can seep into these boards, causing them to swell, rot, or grow mold over time. Since fascia boards also support the gutters, damage here can eventually lead to sagging or detached gutter systems.
The drip edge also protects the roof decking, which is the wooden base layer beneath the shingles. If water sneaks under the shingles at the edges, it can soak into the decking and weaken it structurally. This is one of the leading causes of soft spots and eventual roof collapse in neglected homes.
Another benefit is pest prevention. Small gaps at the roofline are an open invitation for insects, birds, and rodents looking for a way inside. A properly installed drip edge seals off this entry point, keeping unwanted guests out of the attic space.
Finally, a drip edge helps direct water precisely into the gutters rather than letting it run down the siding or pool near the foundation. This reduces the risk of siding stains, basement leaks, and soil erosion around the home.
Types of Drip Edge Profiles
Drip edges come in several shapes, known as profiles, each designed for slightly different roofing needs. The table below outlines the most common types.
| Profile Type | Shape Description | Common Use |
|---|---|---|
| Type C | L-shaped with a simple bend | Basic residential roofs, cost-effective option |
| Type D | Features a longer flange and a small hem | Popular for asphalt shingle roofs, good water diversion |
| Type T | T-shaped profile with extended coverage | Used where extra protection from wind-driven rain is needed |
| Type L | Basic L-shape, similar to Type C but with variations in angle | Lightweight applications and budget projects |
Each profile is chosen based on the roof’s slope, local climate, and the preferences of the roofing contractor. In areas with heavy rainfall or strong winds, a more robust profile like Type T is often recommended.
Materials Used for Drip Edges
Drip edges are manufactured from a variety of materials, each offering a different balance of durability, cost, and appearance.
Aluminum is one of the most widely used materials because it resists rust, is lightweight, and comes pre-painted in various colors to match roofing trim. It is affordable and performs well in most climates, though it can dent if struck with force.
Galvanized steel is another popular choice known for its strength and durability. It holds up well against impact and heavy weather, but it can be prone to rust over time if the protective coating wears down, especially in coastal or humid regions.
Copper is a premium option often chosen for its long lifespan and attractive appearance, which develops a natural patina over the years. While copper drip edges can last decades longer than other materials, they come at a significantly higher price point.
Vinyl or PVC drip edges are less common but are sometimes used in budget-friendly projects. They resist rust completely since they contain no metal, but they are generally less durable than metal options and may become brittle in extreme cold.
Drip Edge vs. Other Roof Components
It is easy to confuse a drip edge with other roofing parts, so let’s clarify the differences.
A drip edge is often compared to general roof flashing, but they are not quite the same thing. Flashing refers to any material used to prevent water intrusion at joints, valleys, chimneys, or vents, while a drip edge specifically refers to the flashing installed along the roof’s outer edges.
A gutter apron is similar to a drip edge but is installed specifically where the roof meets the gutter, directing water precisely into the gutter channel. In many installations, a drip edge and a gutter apron work together, with the drip edge covering the rake edges and a gutter apron handling the eave edges.
The fascia, on the other hand, is not a protective flashing at all. It is the flat board that runs along the roofline, often holding the gutters in place. The drip edge is installed to protect this fascia board from water damage, making the two components closely related but functionally different.
Where Drip Edges Are Installed
Drip edges are installed at two main locations on a roof. Along the eaves, which are the horizontal lower edges of the roof, the drip edge is typically placed underneath the underlayment so that water flows over it and into the gutter. Along the rakes, which are the angled edges running up the sides of the roof, the drip edge is usually installed on top of the underlayment to prevent wind-driven rain from getting underneath the shingles.
This installation order matters a great deal. If installed incorrectly, water can bypass the drip edge entirely and still find its way into the roof structure, defeating the purpose of having one in the first place. This is why professional installation following local building codes is so important.
Do You Need a Drip Edge? (Building Codes)
In most regions, the answer is a firm yes. Building codes such as the International Residential Code (IRC) require drip edges on new roof installations and major roof replacements in many jurisdictions. These codes exist because water damage caused by missing drip edges has historically been a common and costly problem for homeowners.
That said, code requirements can vary depending on your city, county, or state, so it is worth checking with a local roofing contractor or building authority to confirm the specific rules in your area. Skipping a drip edge, even where not strictly mandated, is generally considered poor roofing practice and can lead to voided warranties from shingle manufacturers, many of whom require drip edges as a condition of their warranty coverage.
Signs of a Damaged or Missing Drip Edge
Recognizing the warning signs of a failing drip edge can save you from costly repairs down the road. Visible rust or corrosion along the metal strip is often the first sign that a drip edge is deteriorating, particularly with steel versions that have lost their protective coating.
Water stains running down the fascia board are another telltale sign, indicating that water is not being properly diverted into the gutters. Similarly, peeling or bubbling paint near the roofline often points to trapped moisture caused by an ineffective or missing drip edge.
Homeowners should also watch for signs of pest activity near the roof edge, such as small holes, nesting materials, or insect activity, since gaps left by a damaged drip edge create easy access points for unwanted wildlife.
Installation Basics (Overview, Not DIY Steps)
While drip edge installation might look simple, it involves precise measurements, proper overlap between sections, and correct placement relative to the underlayment. A general overview of the process includes measuring and cutting the drip edge to fit the roof’s dimensions, securing it with roofing nails spaced at regular intervals, and overlapping sections by a few inches to prevent gaps.
One of the most common mistakes made during installation is placing the drip edge in the wrong order relative to the underlayment, which can cause water to bypass the flashing entirely. Another frequent error is using mismatched materials that react poorly with each other, such as pairing aluminum drip edges with certain treated woods, which can cause corrosion over time.
Because proper installation directly affects how well the drip edge performs, most homeowners choose to hire a licensed roofing contractor rather than attempting this as a do-it-yourself project, especially for full roof replacements.
Cost Considerations
The cost of a drip edge depends on the material chosen, the length of roofline being covered, and regional labor rates. The table below offers a general idea of typical price ranges.
| Material | Average Cost per Linear Foot |
|---|---|
| Aluminum | Affordable, budget-friendly option |
| Galvanized Steel | Slightly higher than aluminum, more durable |
| Copper | Premium pricing, significantly more expensive |
| Vinyl/PVC | Lowest cost, but shorter lifespan |
Labor costs will vary based on the complexity of the roof, the contractor’s rates, and whether the drip edge is being installed as part of a larger roofing project or as a standalone repair. Replacing a damaged drip edge alone is usually far less expensive than replacing an entire roof, making it a cost-effective way to prevent bigger problems down the line.
Maintenance Tips
Keeping a drip edge in good condition does not require much effort, but regular attention goes a long way. Homeowners should inspect their roofline at least once or twice a year, ideally during spring and fall, to check for rust, dents, or separation from the roof structure.
Clearing leaves, twigs, and other debris away from the roof edge and gutters helps prevent water from pooling and undermining the drip edge’s effectiveness. If any section shows significant rust, bending, or gaps, it is best to have it repaired or replaced promptly rather than waiting for the damage to spread to the fascia or decking underneath.
Frequently Asked Questions
Is a drip edge necessary? Yes, in most cases. Building codes in many areas require it, and even where it is not mandated, it plays a critical role in protecting the roof structure from water damage.
Can I install a drip edge myself? While it is technically possible for an experienced do-it-yourself homeowner, proper installation requires precise placement relative to the underlayment. Most experts recommend hiring a professional to ensure it performs correctly.
How long does a drip edge last? This depends on the material. Aluminum and galvanized steel drip edges typically last as long as the roof itself, often twenty to thirty years, while copper can last even longer.
Does the drip edge style or color matter? Functionally, all properly installed drip edges perform the same core job. However, matching the color and profile to your roofing and trim can improve the overall appearance of your home.
Conclusion
So, what is a drip edge on a roof? It is a small but essential piece of metal flashing that protects your home from water damage, pest intrusion, and structural decay by directing rainwater safely away from the fascia and into the gutters. Though often overlooked, this simple component can save homeowners thousands of dollars in repair costs over the lifespan of a roof.
Whether you are building a new home, replacing an old roof, or simply noticing signs of wear along your roofline, taking the time to inspect or install a proper drip edge is a small investment that delivers long-term protection for your entire home.
Related Articles
How To Restain Kitchen Cabinets? Step-By-Step Guide For Beginners
How Much Does It Cost to Replace a Roof? Full Material Price Guide
How to Measure a Toilet? A Complete Step-by-Step Guide
Can You Paint a Metal Roof? The Complete Answer Homeowners Need
How Much Do Kitchen Cabinets Cost in 2026? Complete Pricing Guide